Garrison Loop LED Curing Light: A Performance and Safety Assessment by Bluelight Analytics
Case Details
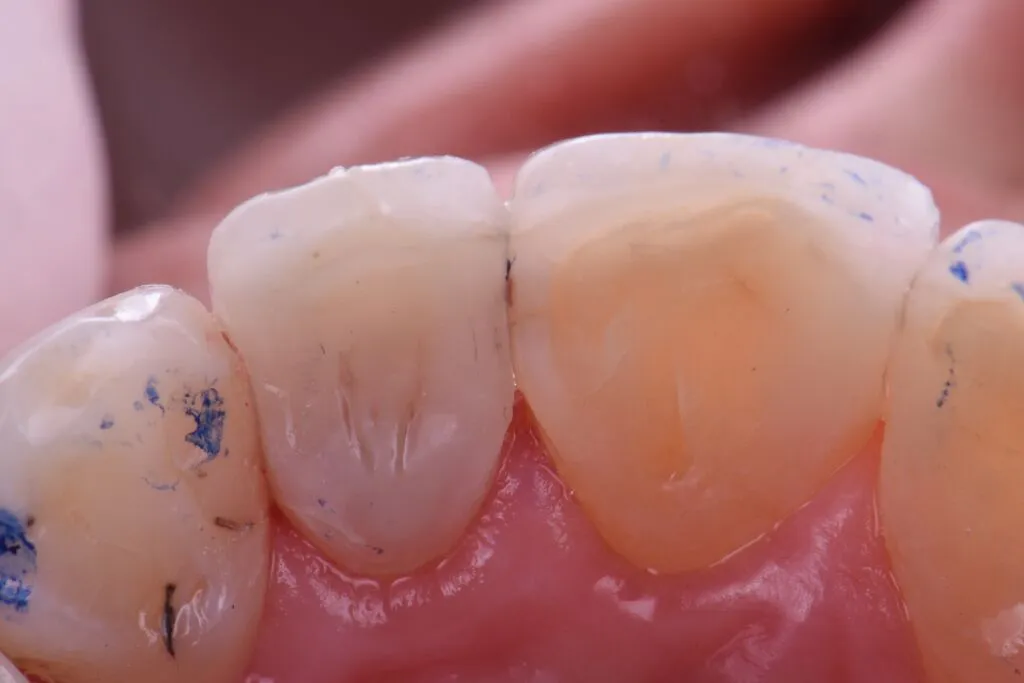
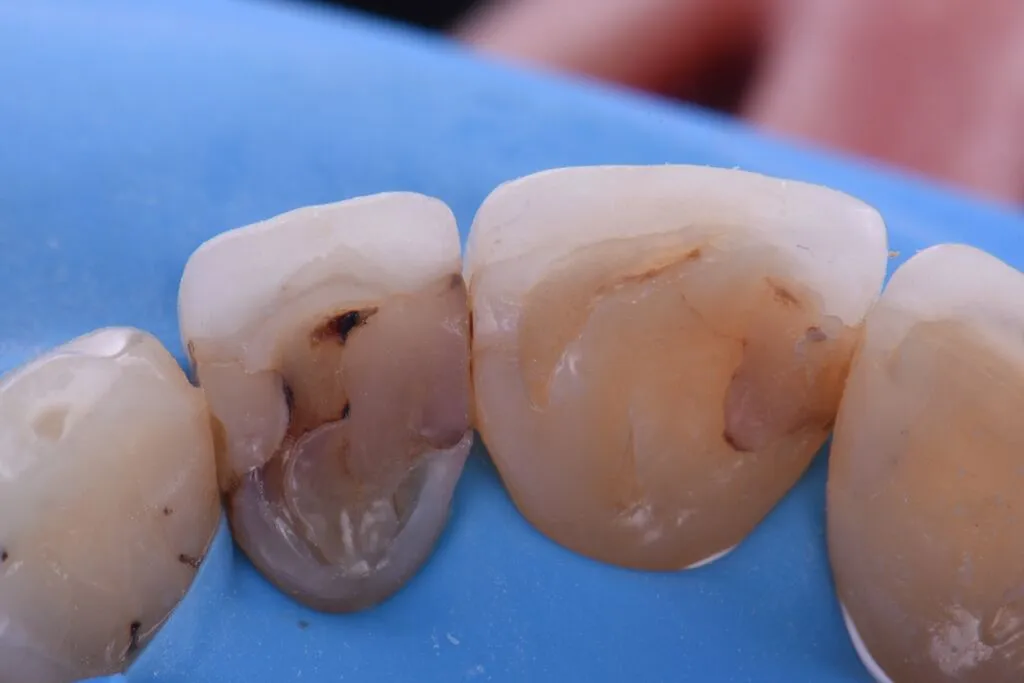
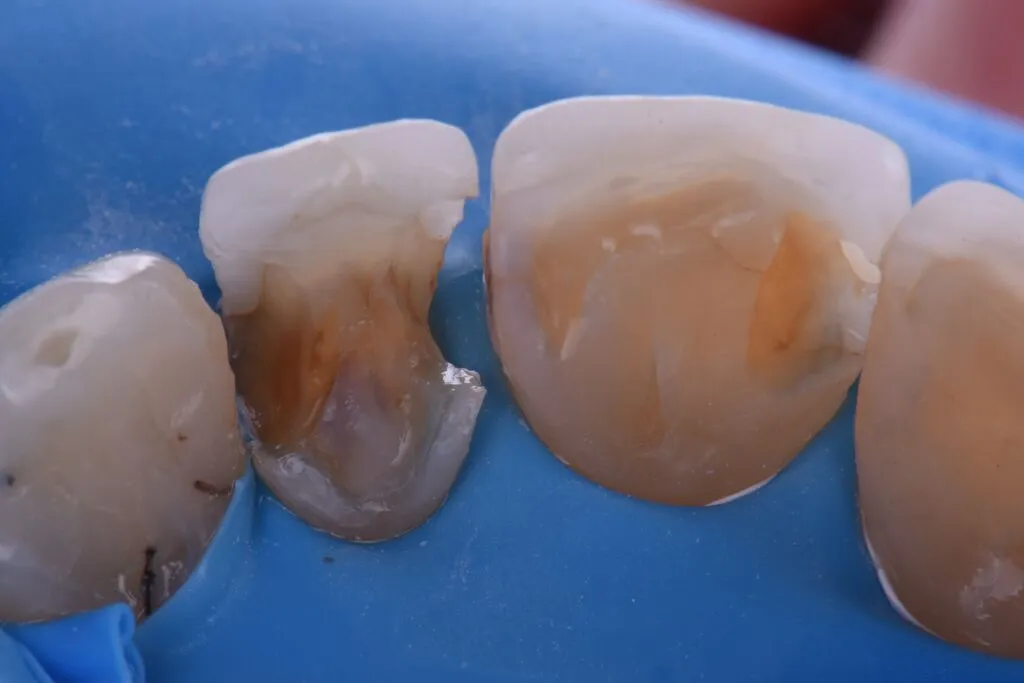
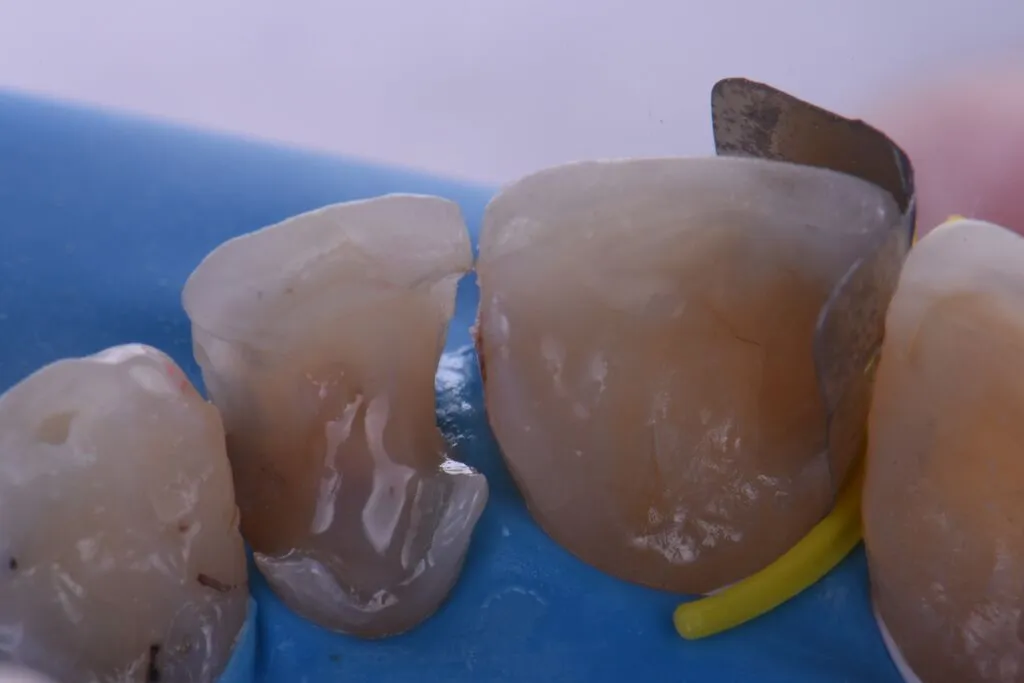
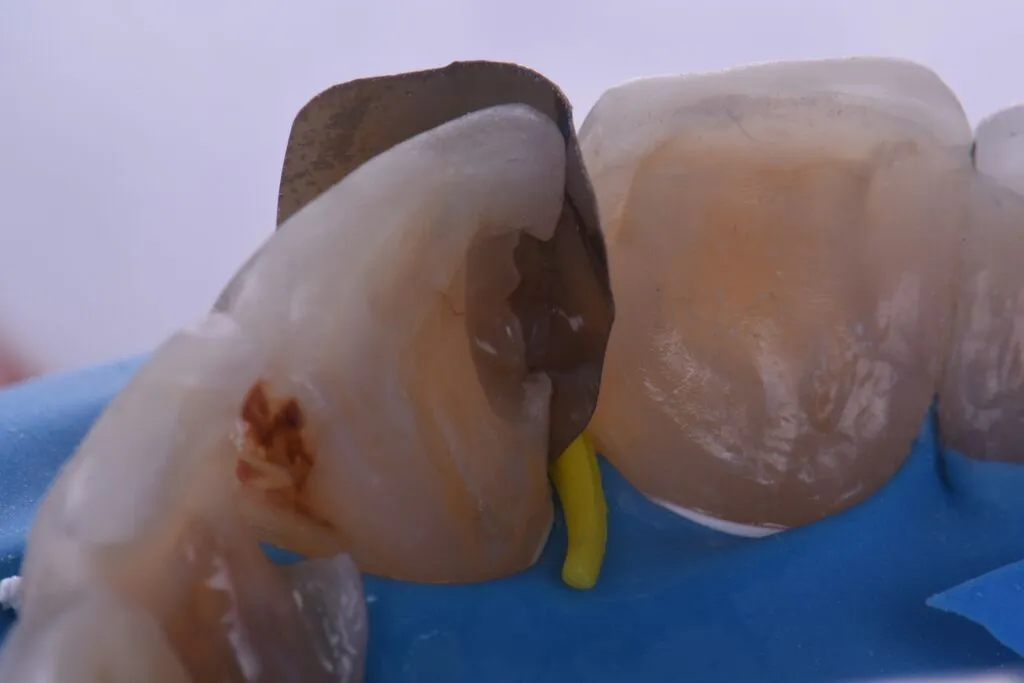
The patient was anesthetized using 1 carpule of 2% Lignocaine w/ 1:100,000 epinephrine before rubber dam isolation was secured using individual floss ties to gain maximal cervical exposure (Fig 001). Preparations were completed with recurrent caries removed, resulting in preparation outline forms that involved both feldspathic porcelain as well as minimal cervical enamel, exposed cementum and of course, dentin (Fig 002). The preparations were beveled before subjected to micro air abrasion using 27-micron aluminum oxide (Prep Start, Danville Engineering) set to 30-40psi of pressure. The feldspathic porcelain was subjected to a 5% hydrofluoric acid treatment for 1 minute before rinsing and applying 33% orthophosphoric acid (Ultra-Etch, Ultradent Products) to the enamel for 10 seconds before applying etch to dentin for 12 seconds. The preparation was thoroughly dried at this stage before application of a 10-MDP silane coupling agent (G-MultiPrimer, GC America) to the feldspathic porcelain for 1 minute. Again, the preparation was air dried as the porcelain was now prepared but the dentin not so. A 2% Chlorhexidine scrub (Vista Products) was applied to the dentin for 30 seconds with two functions: 1) The inhibition of bond-degrading matrix metalloproteinases which are activated by orthophosphoric acid and 2) Rewetting of dentin only to blot dry to a moist dentin state before application of a 5th generation total etch adhesive (MPa Max, Clinicians Choice). Following air-driven evaporation of the primer/carrier, the adhesive was cured. The pulpoaxial walls were micro-lined with 0.25mm increments of ClearFil Majesty Esthetic flowable not exceeding a thickness of 1.5mm in the first 5 minutes, with the aim of not linking dentin with enamel increments during this critical time of Immediate Dentin Sealing and Resin Coat application. The #8MP was isolated with a Garrison Fusion anterior matrix, which allowed for controlled placement sub gingivally with excellent tactile feedback. With tight contacts, ease of placement is still possible with the surgical steel construction, minimizing the risk of crumpling as seen with acetate forms (Indeed, the band can easily be reused for use on adjacent teeth in the same procedure if not damaged). Note that correct placement requires initial finger pressure on the opposite side of planned restorative access before the Curved Wedge is applied. This will ensure that the matrix: i) will open adequately and in the right curvature on the opposite side, ready for restorative access (Fig 003 and 004) it will prevent the operator from thinking that the opening is “equal on both sides” as this is not the correct buccolingual position of the band. Note that with lesions that are wide bucco-lingually, there exists the possibility to flip the matrix band upside down with the wider aspect located cervically to accommodate these larger preparations. When placing the Curved Wedge, hold your finger flat against the surface opposite to planned restorative access and insert firmly allowing it to wrap around the target tooth. The wedge will want to move during insertion, but ensure the orientation is maintained and it will “GPS guide” itself into position. This curved design allows for ultimate cervical sealing not only proximally but acts to actively minimize the formation of overhangs, which is a common frustration of regular Class III workflows (Fig 005).
The restoration was layered to completion using a single shade of A2 Grandio SO (Voco America). The matrix was secured on #7MP with the yellow Curved Wedge in the same fashion before completing the DP separately as per the author’s preference. Indeed, the MP and DP can be completed simultaneously as per operator preference. It is important to select a Curved Wedge that has adequate separation force, akin to the technique when using wooden wedges – this is to ensure adequate contact strength development as there is no tension ring in anterior applications unlike with the Composi-Tight 3D Fusion posterior technique (Fig 006). The Curved Wedges are designed to sit sub gingivally with the separate strut at an equigingival level, so that the emergence profile is never compromised.
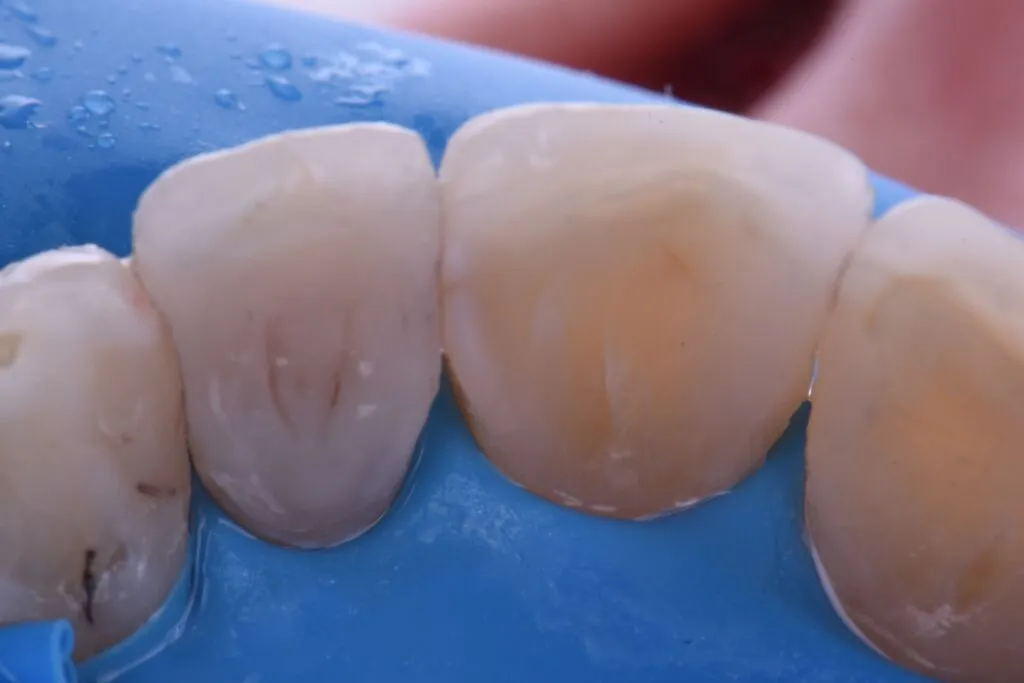
The occlusion-adjusted view demonstrates a harmonious emergence profile with excellent proximoaxial contours and contact strength. Overall, the outstanding chameleon effect of the composite material (Grandio SO, Voco America) paired with the superb flexural (187MPa initial, 158MPa after thermocycling for 5000 cycles) and compressive strength (439MPa) of the material should see these restorations service the patient for many, many years to come.
[[Product Title]]
[[Product Title]]
[[Product Title]]
[[Product Title]]
[[Product Title]]
[[Product Title]]
