Case Details
Introduction –
Restoring a Class 2 defect may seem simple—just place a slice of composite into the cavity and cure it—but this approach neglects crucial factors like contacts, contours, and gingival health. Any mistake in technique can compromise the entire quadrant, damaging both hard and soft tissues. Restoring Class 2 defects is one of the most complex challenges in restorative dentistry, and dealing with adjacent defects tests both your skills and knowledge. This case presentation demonstrates how to effectively restore improperly treated adjacent Class 2 defects using the right techniques, combined with the expertise required and the advanced Quad Matrix System from Garrison.
Case History –
A 62-year-old male presented to our dental office with complaints of gum pain in the maxillary right quadrant and an inability to chew effectively.
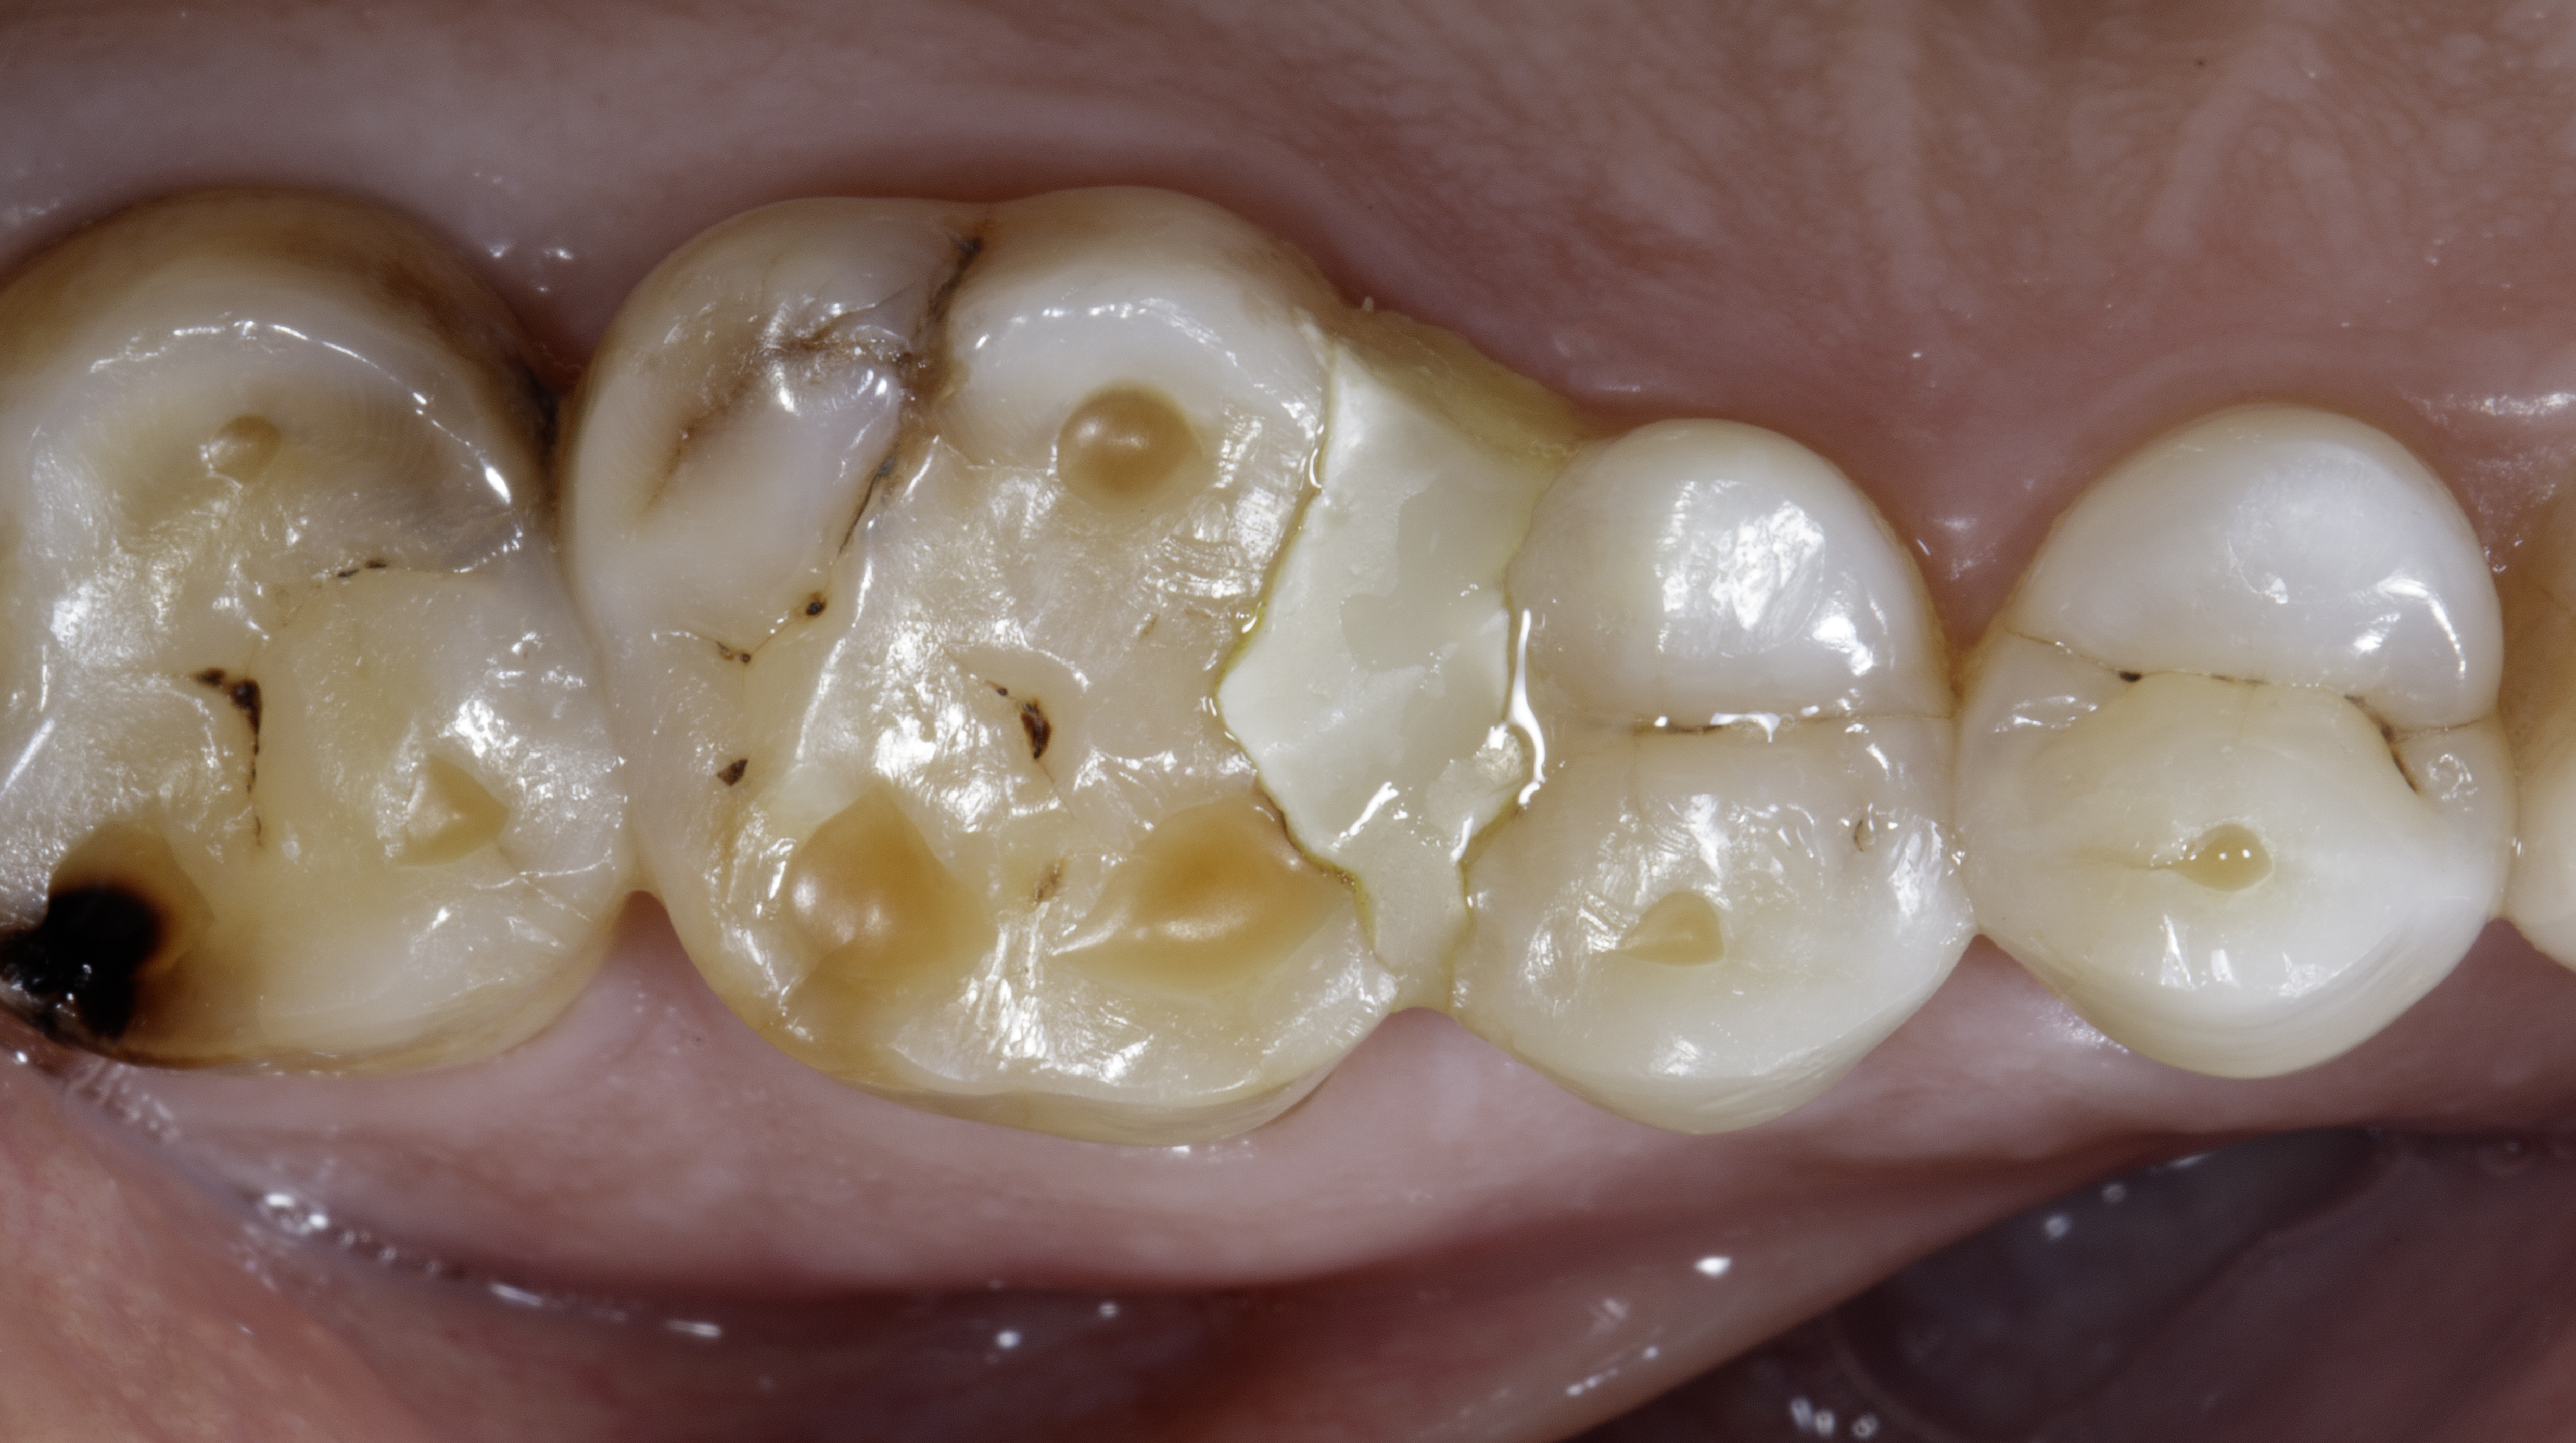
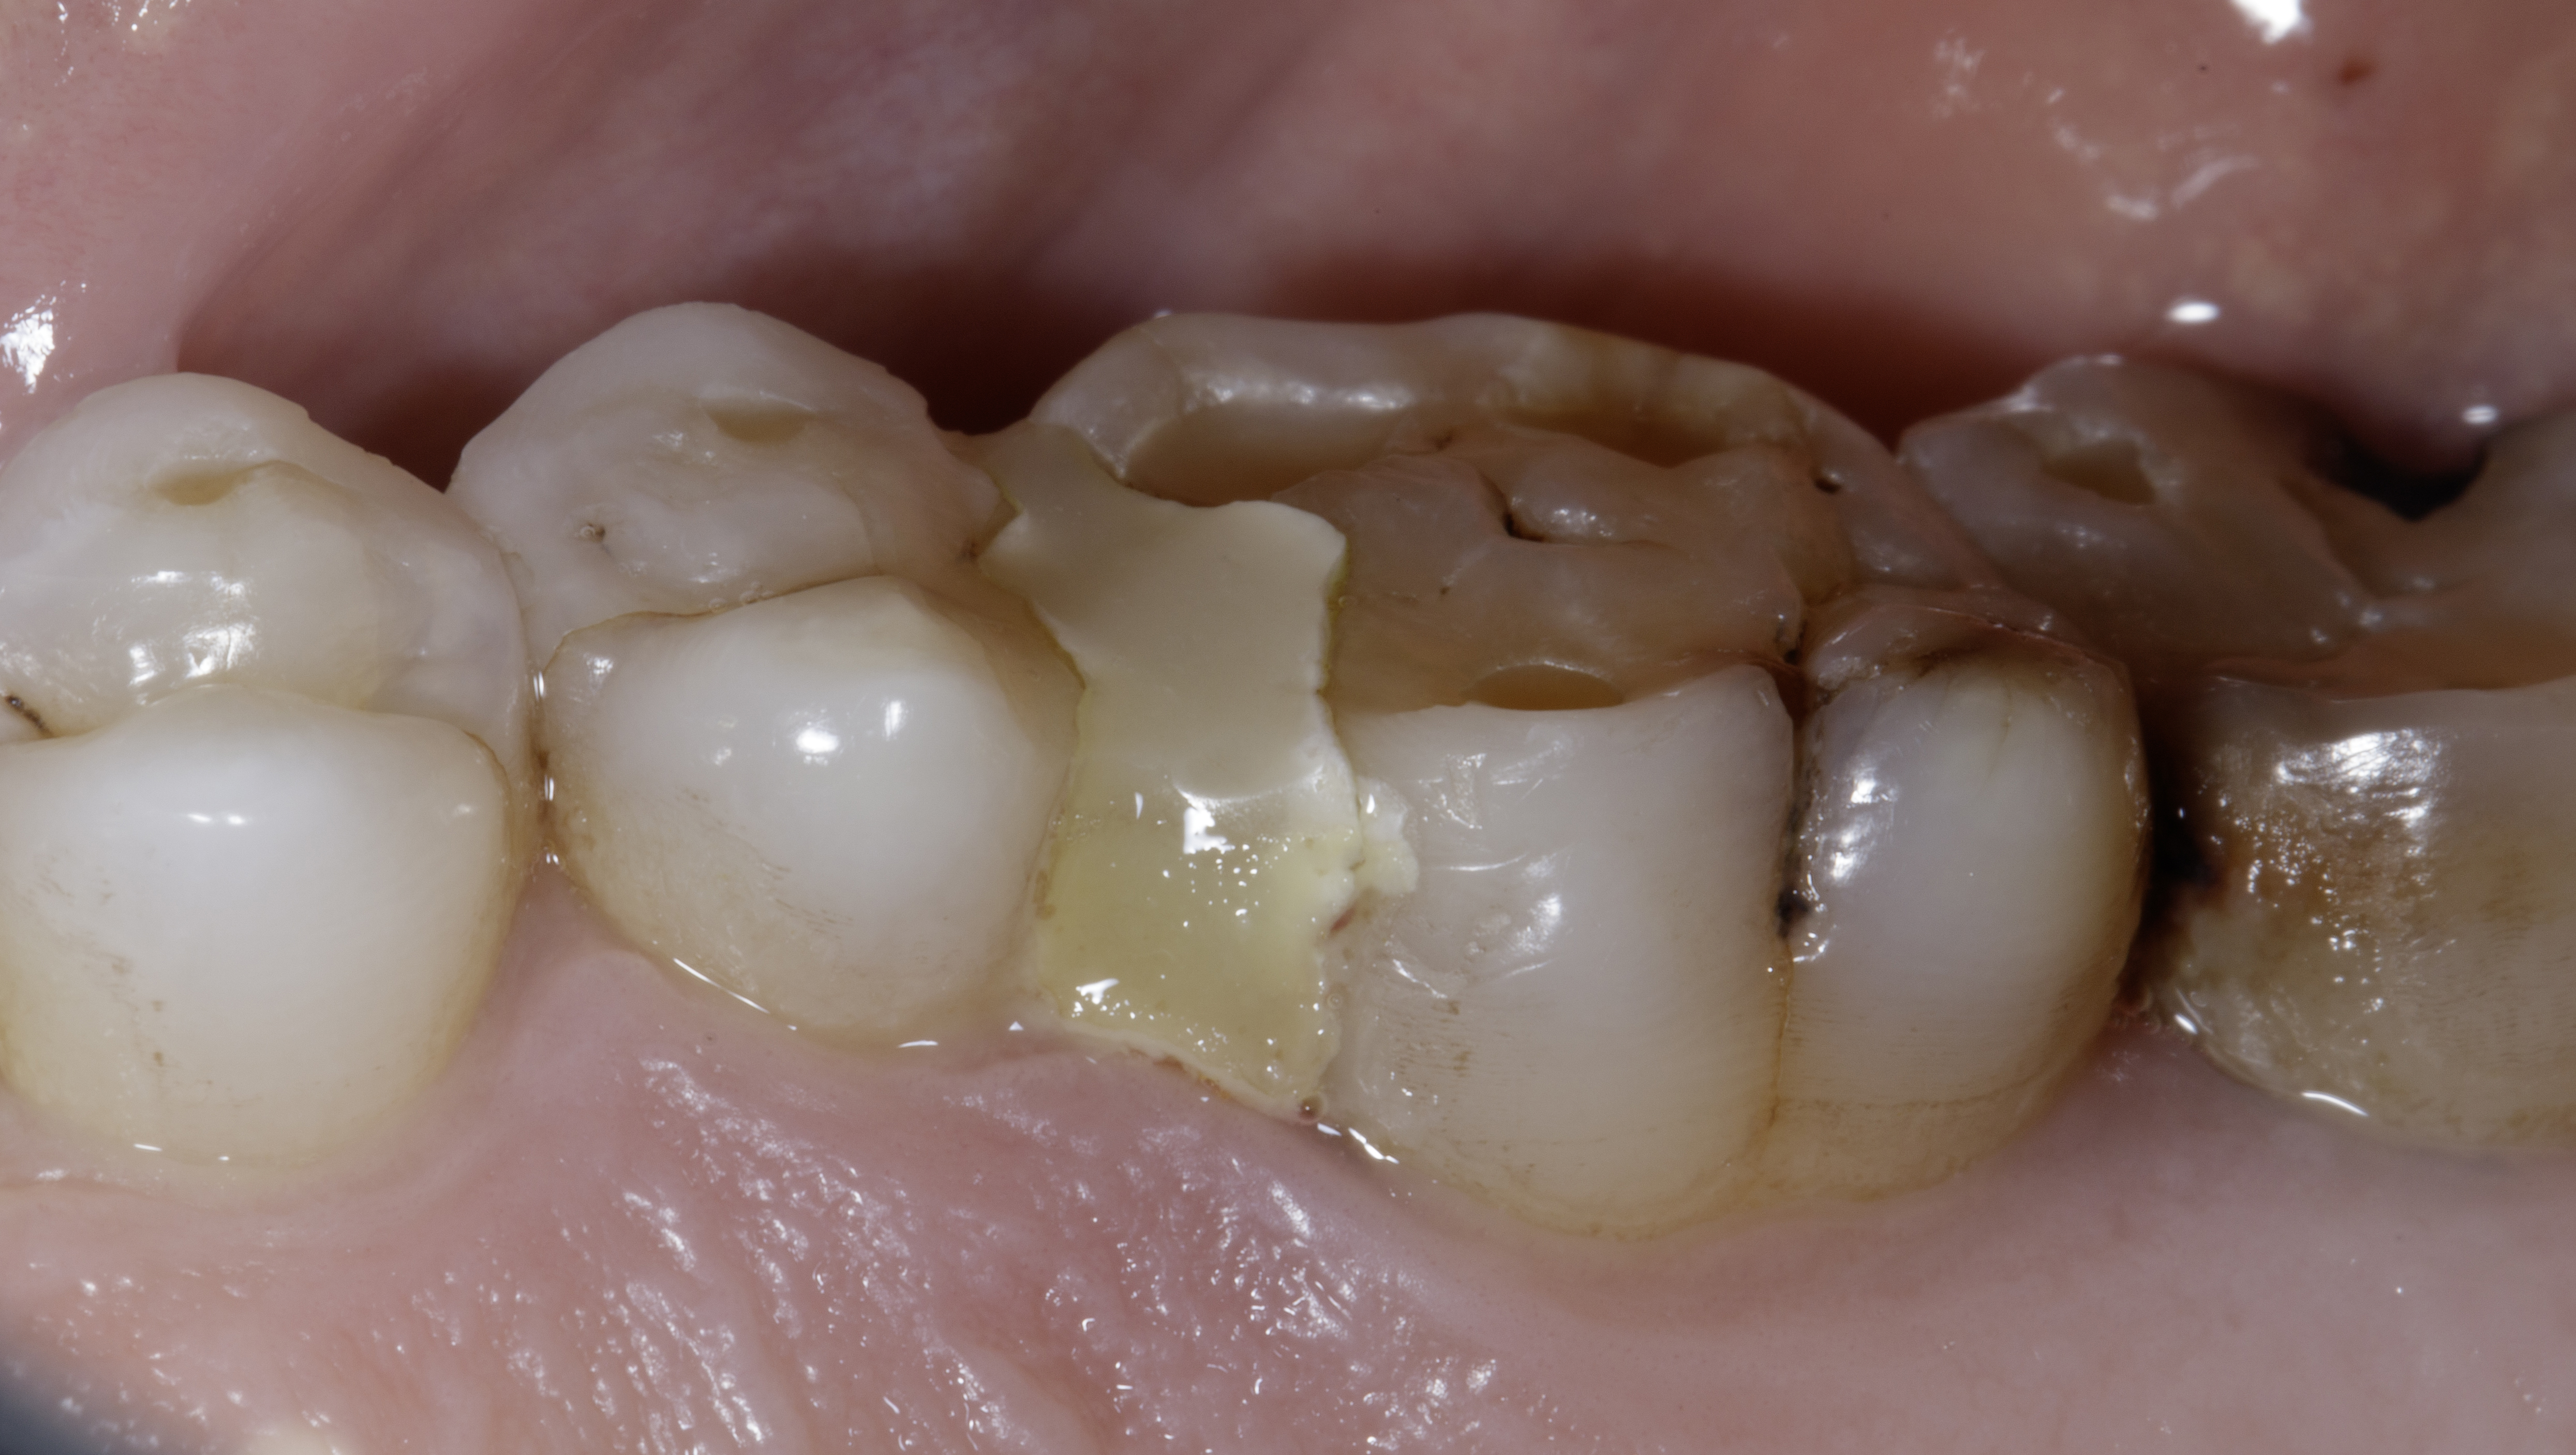
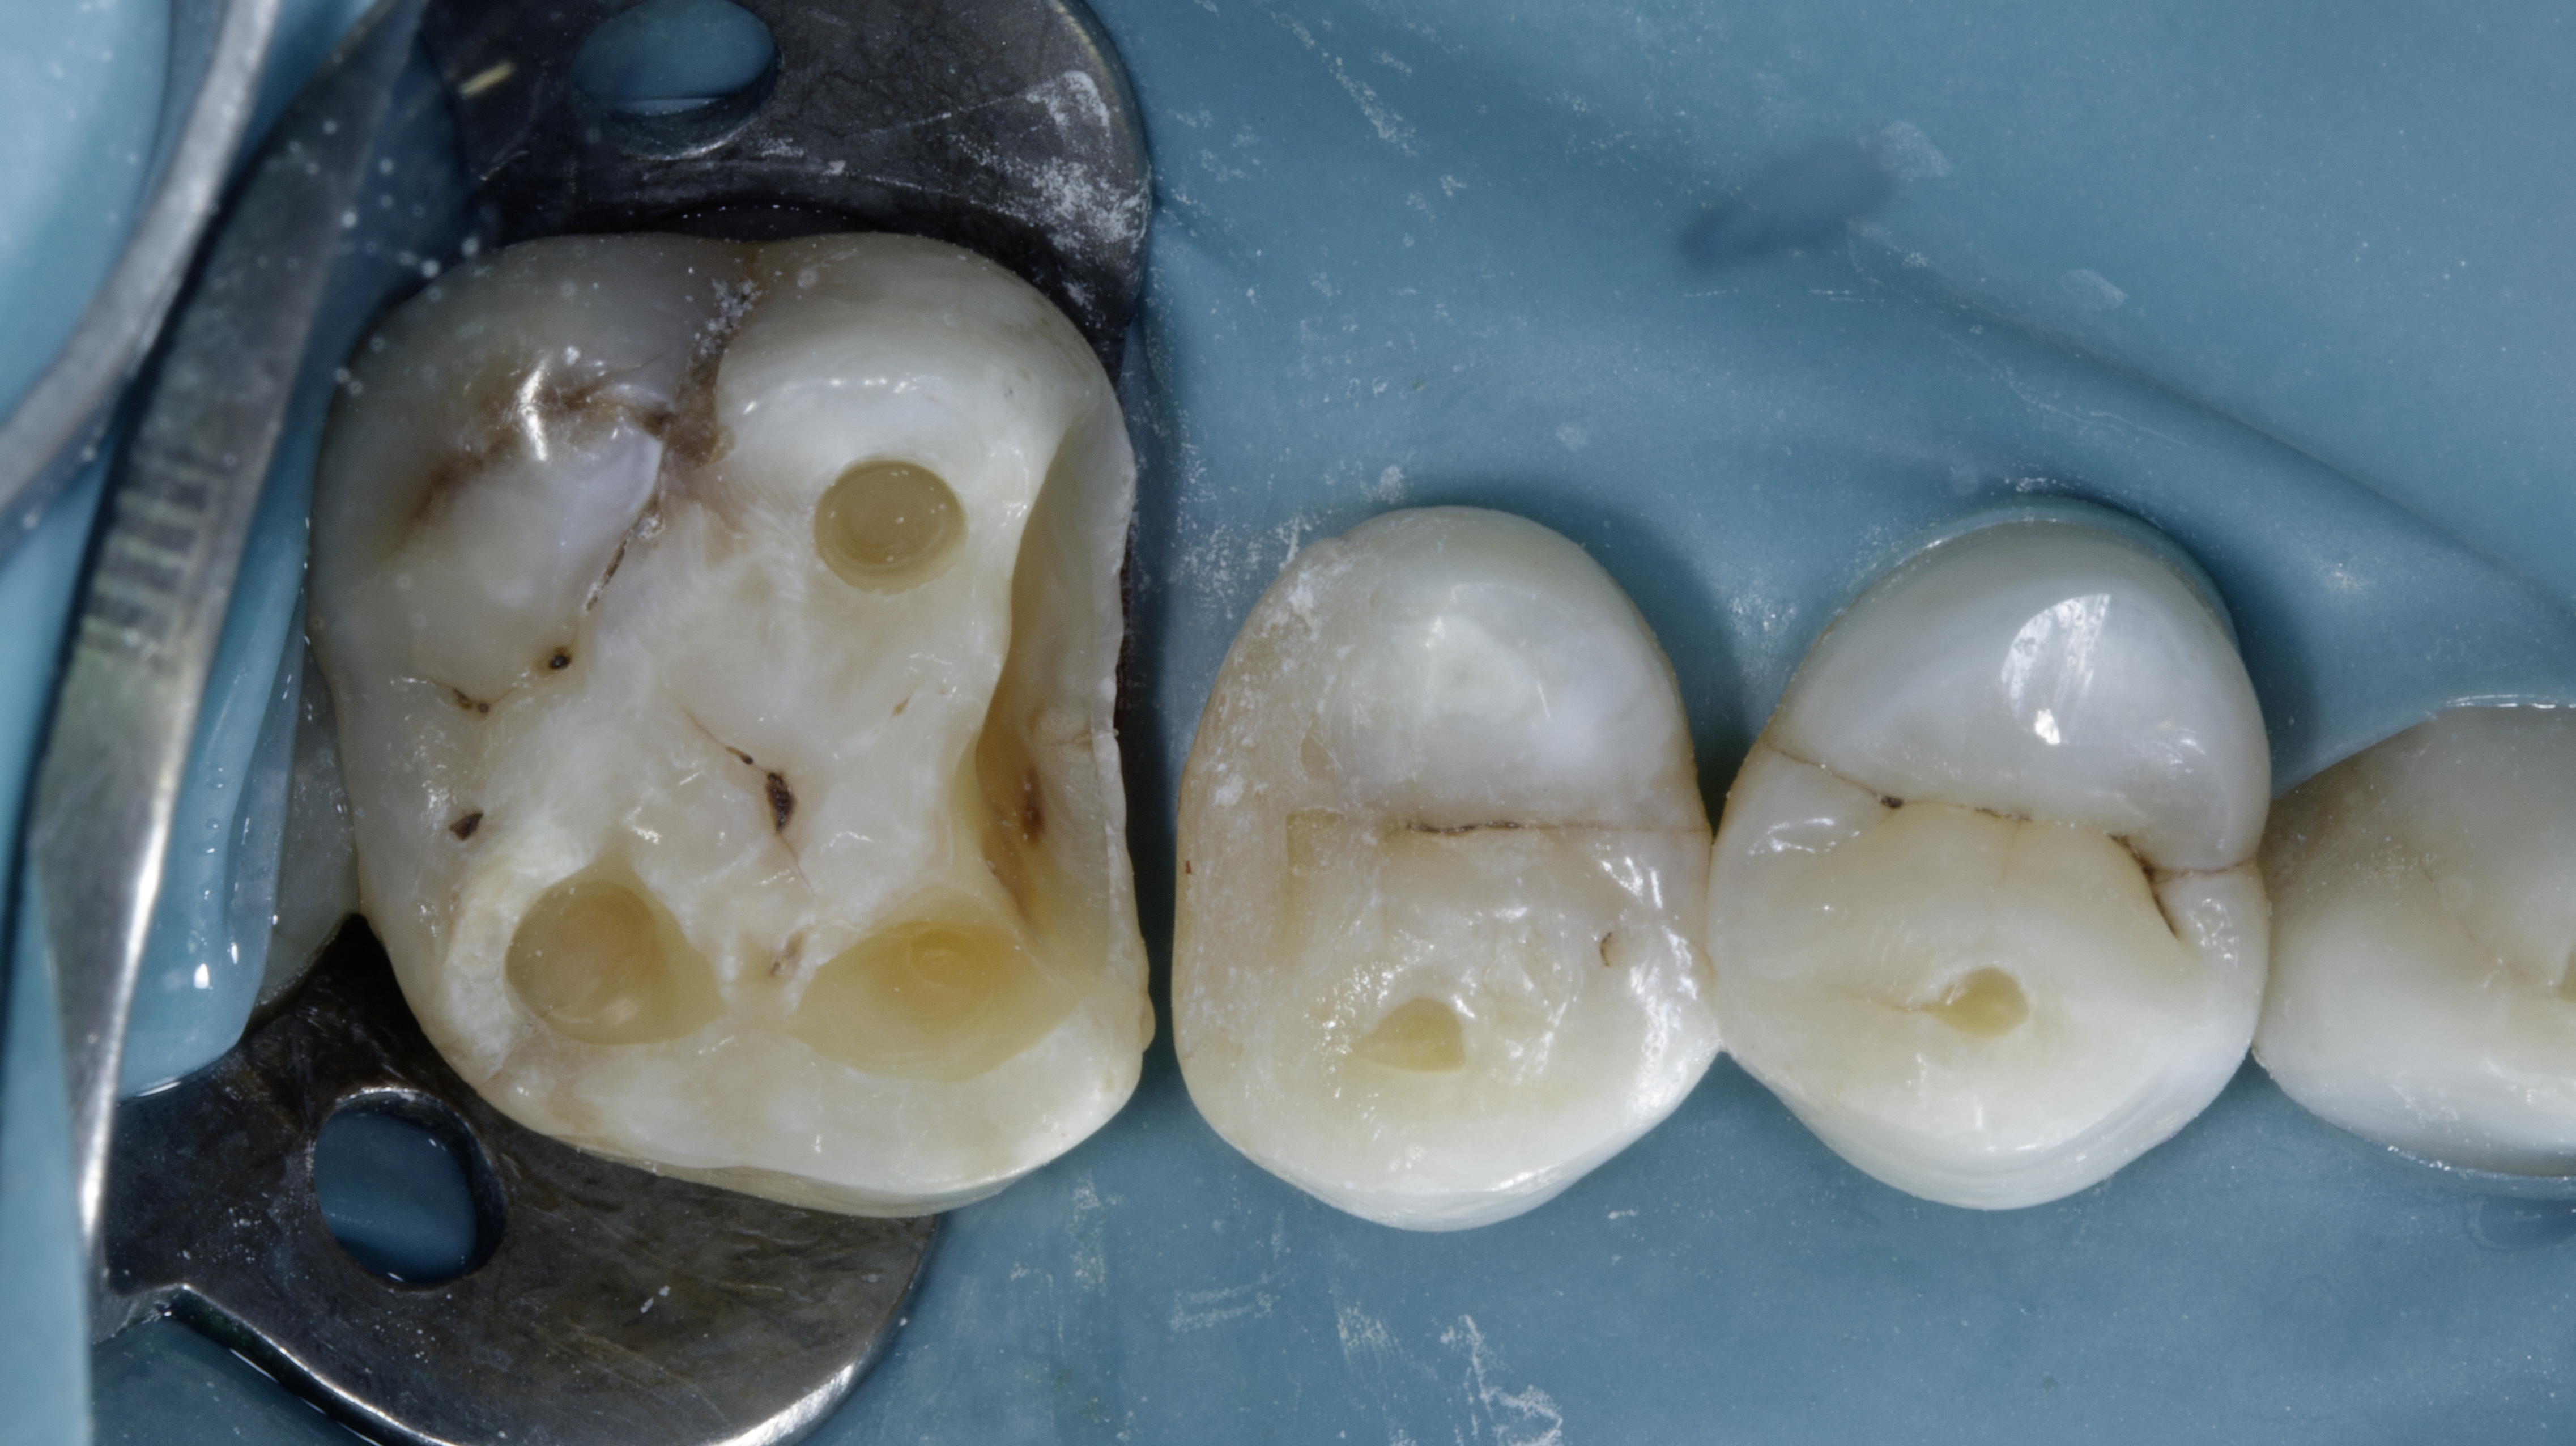
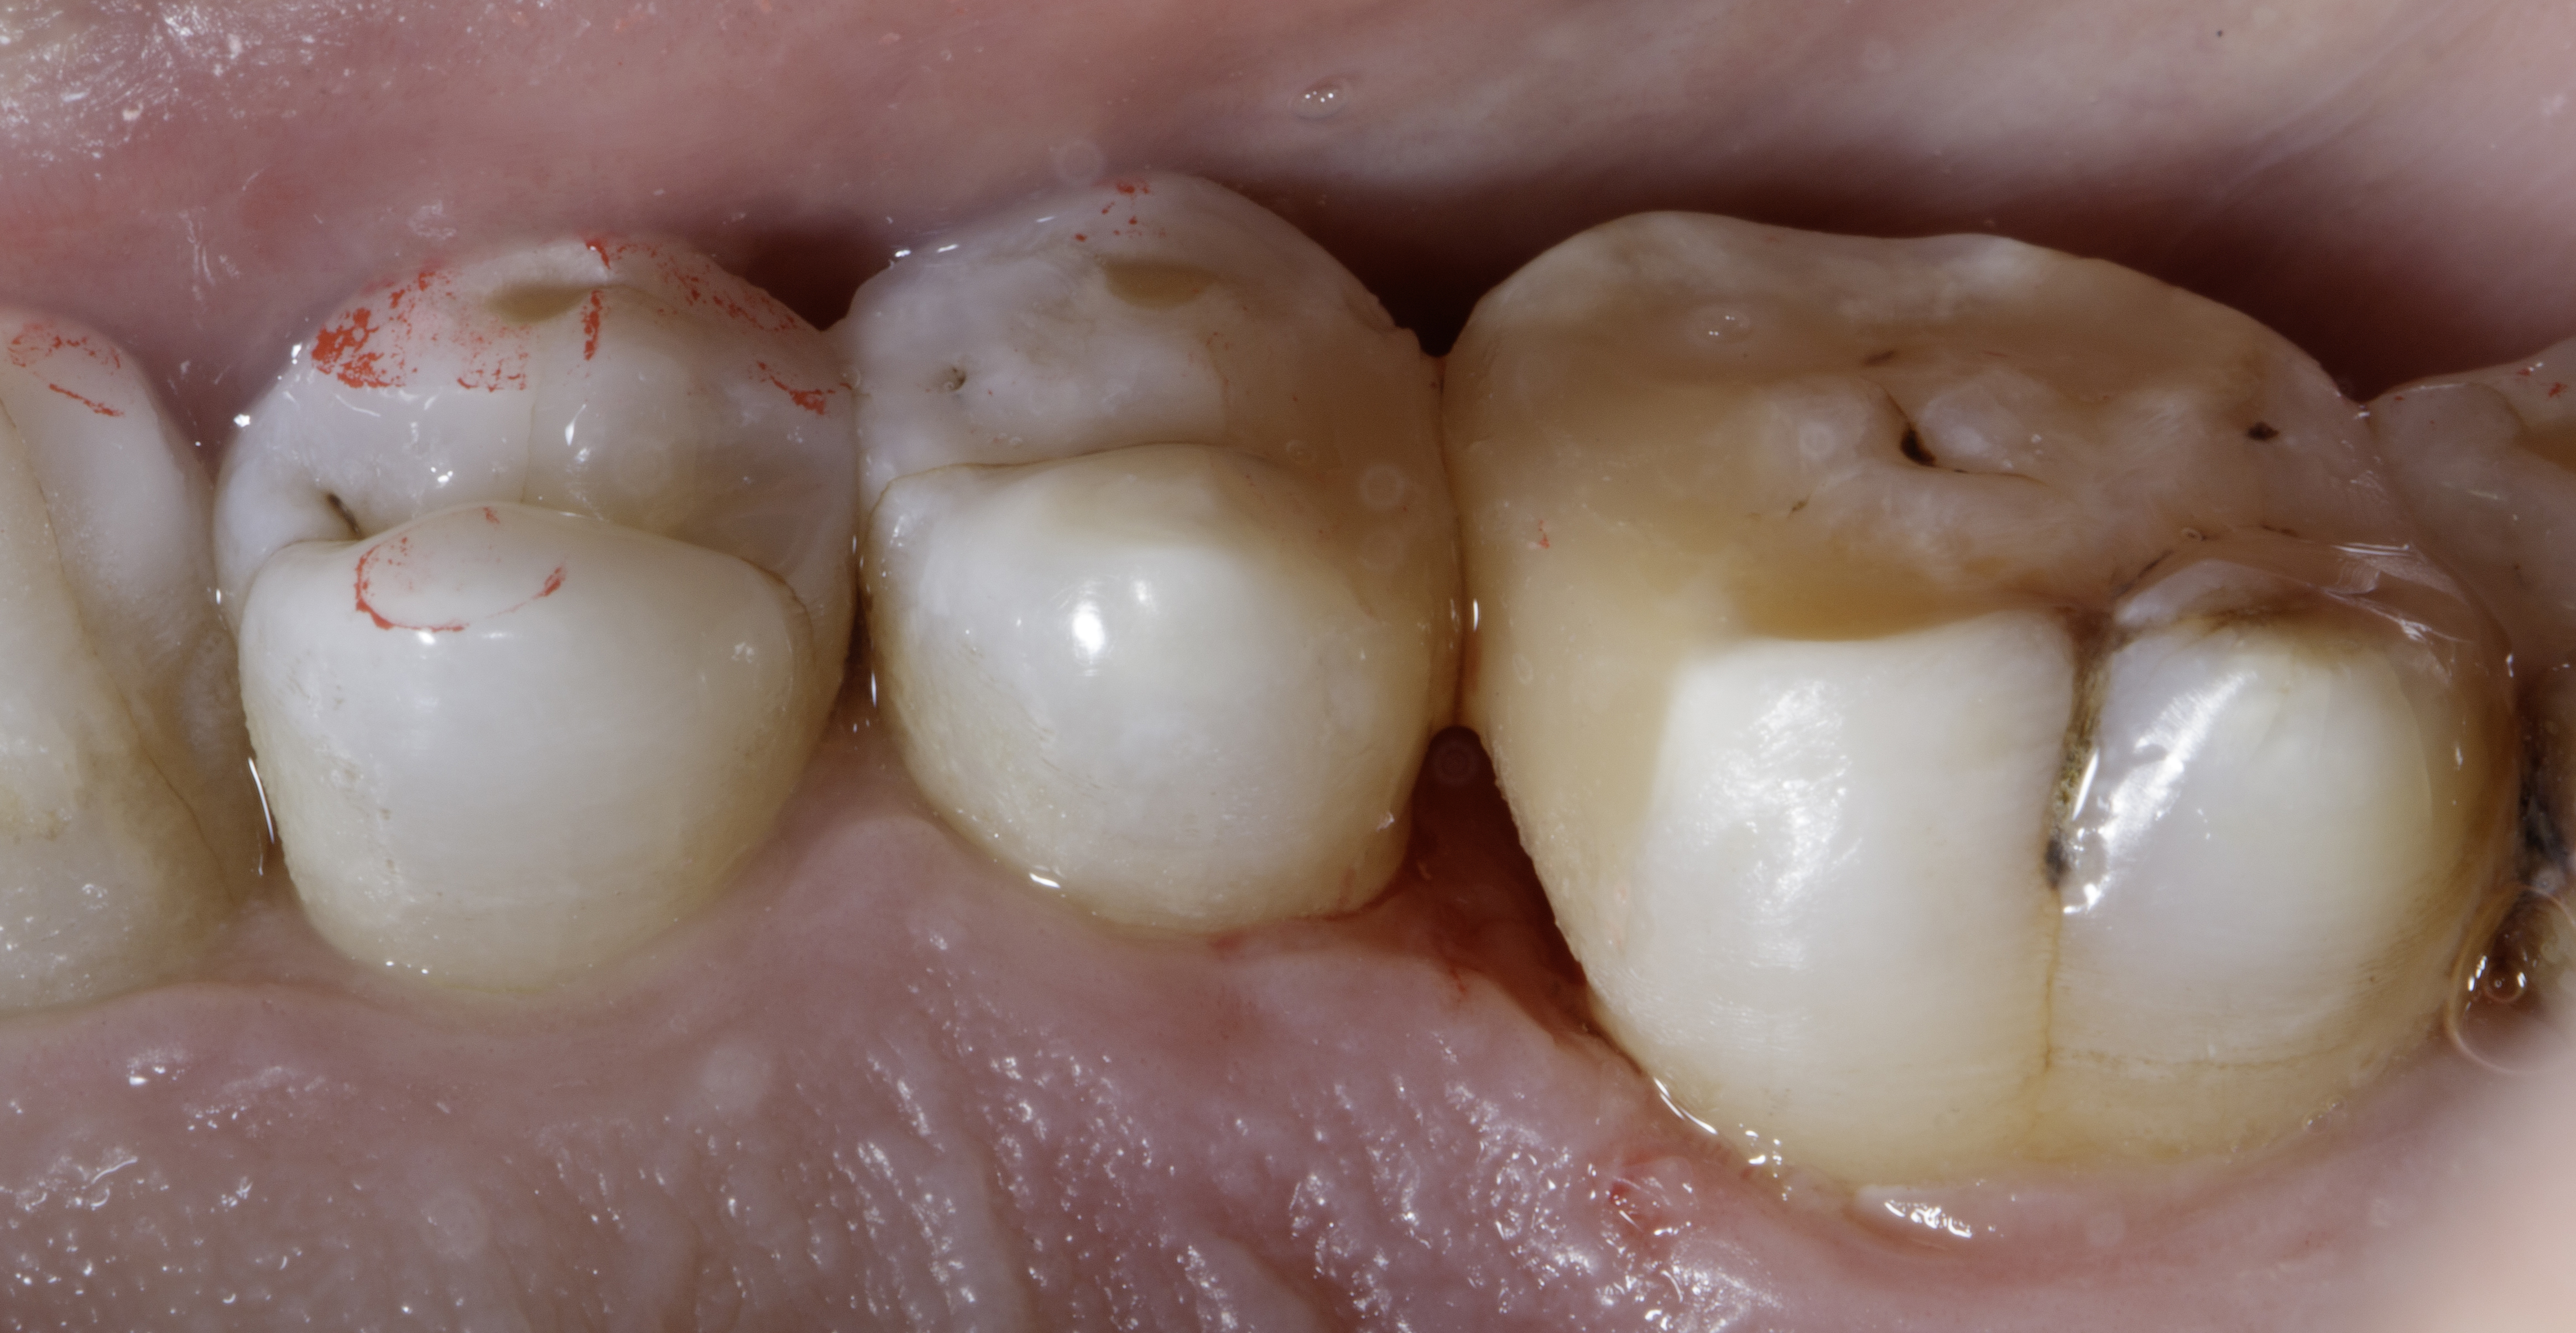
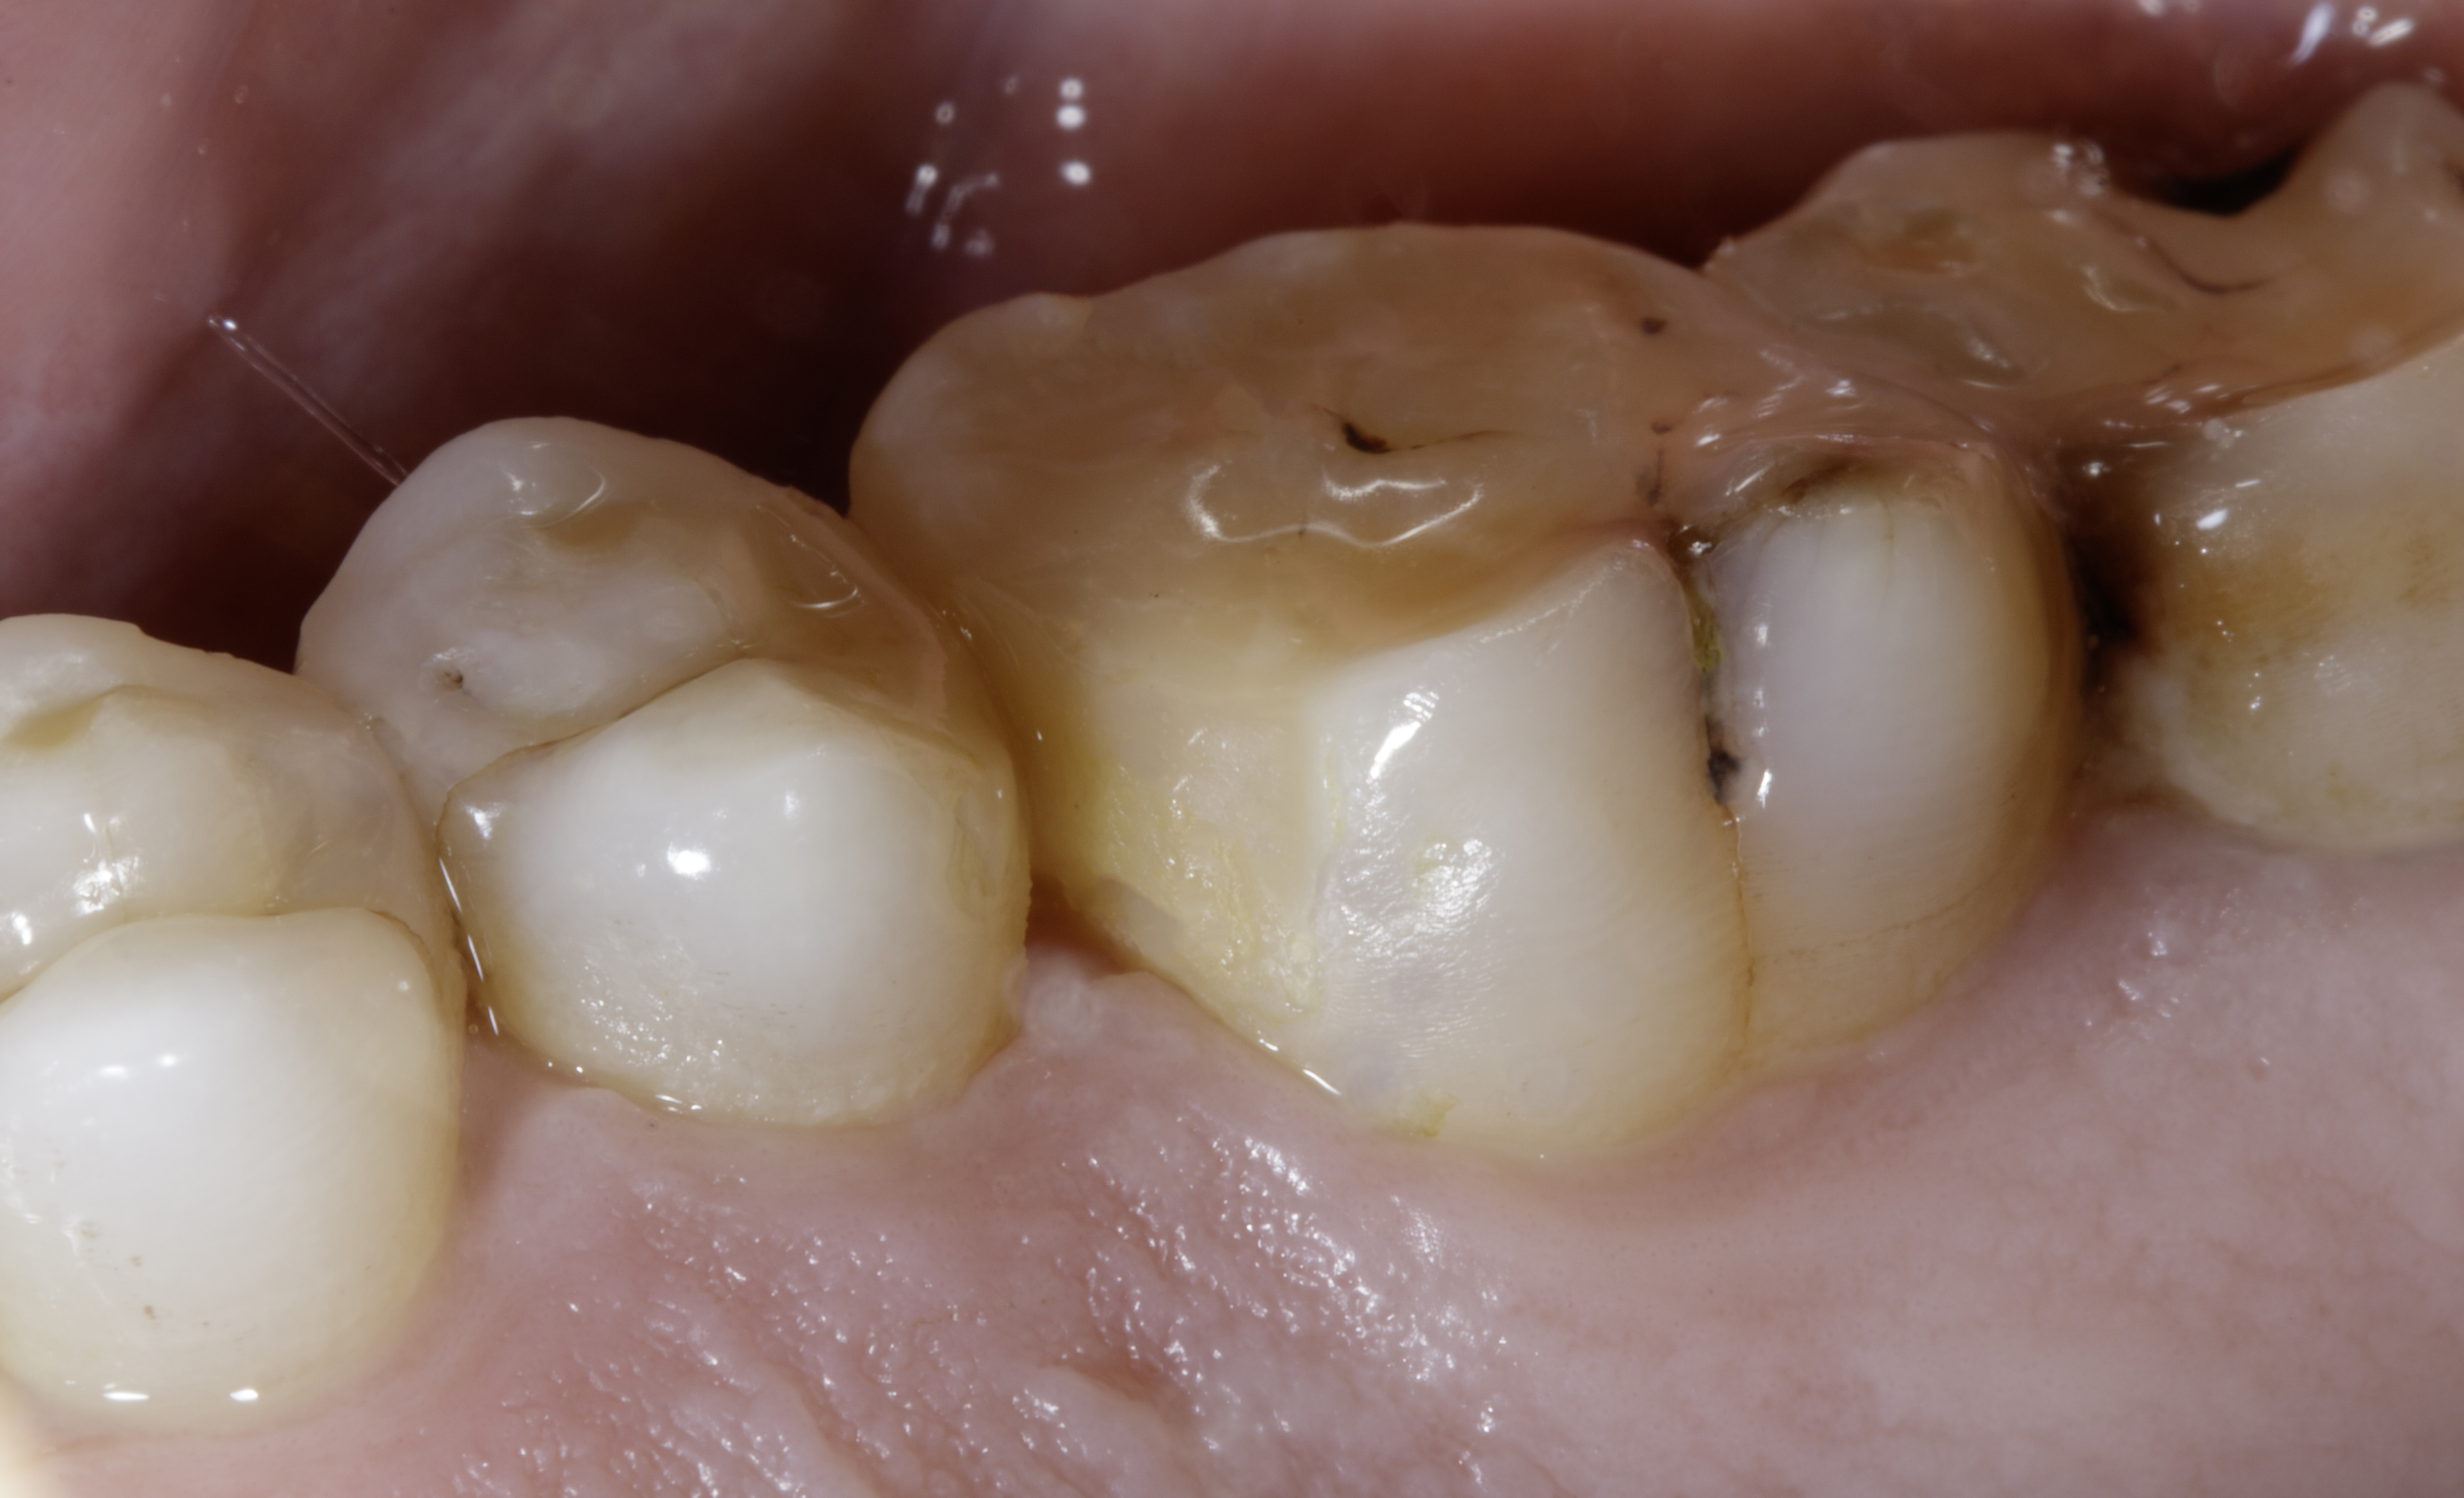
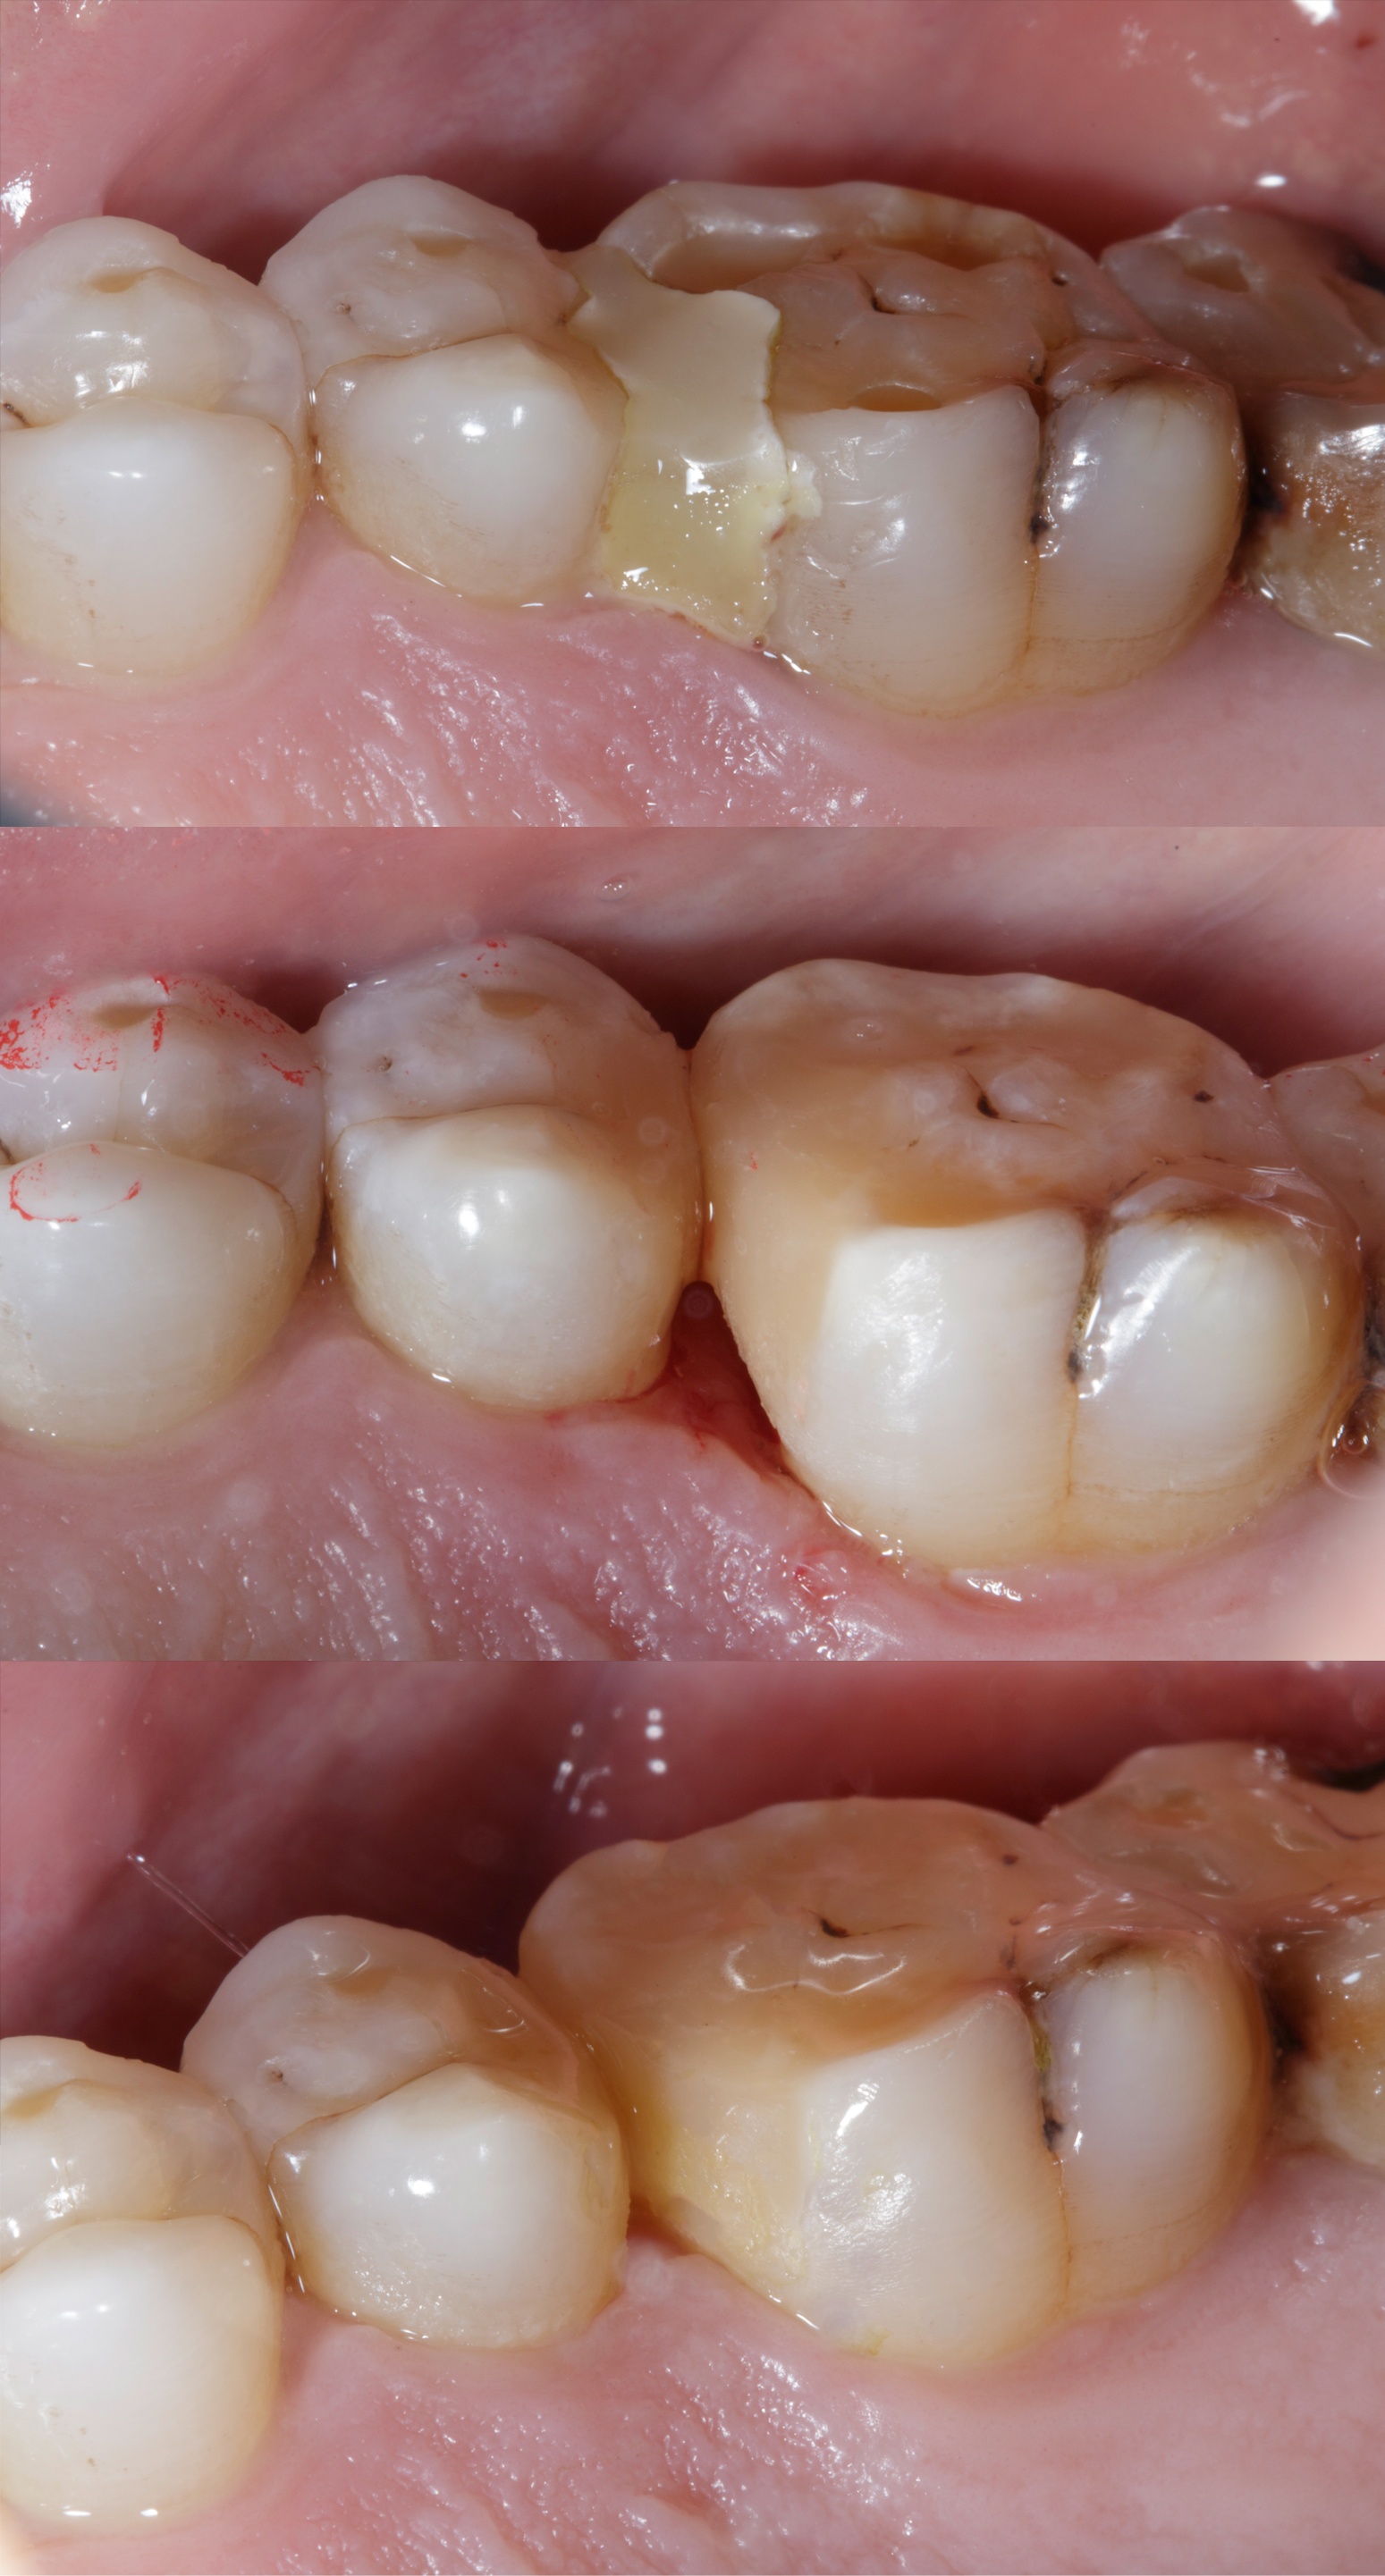
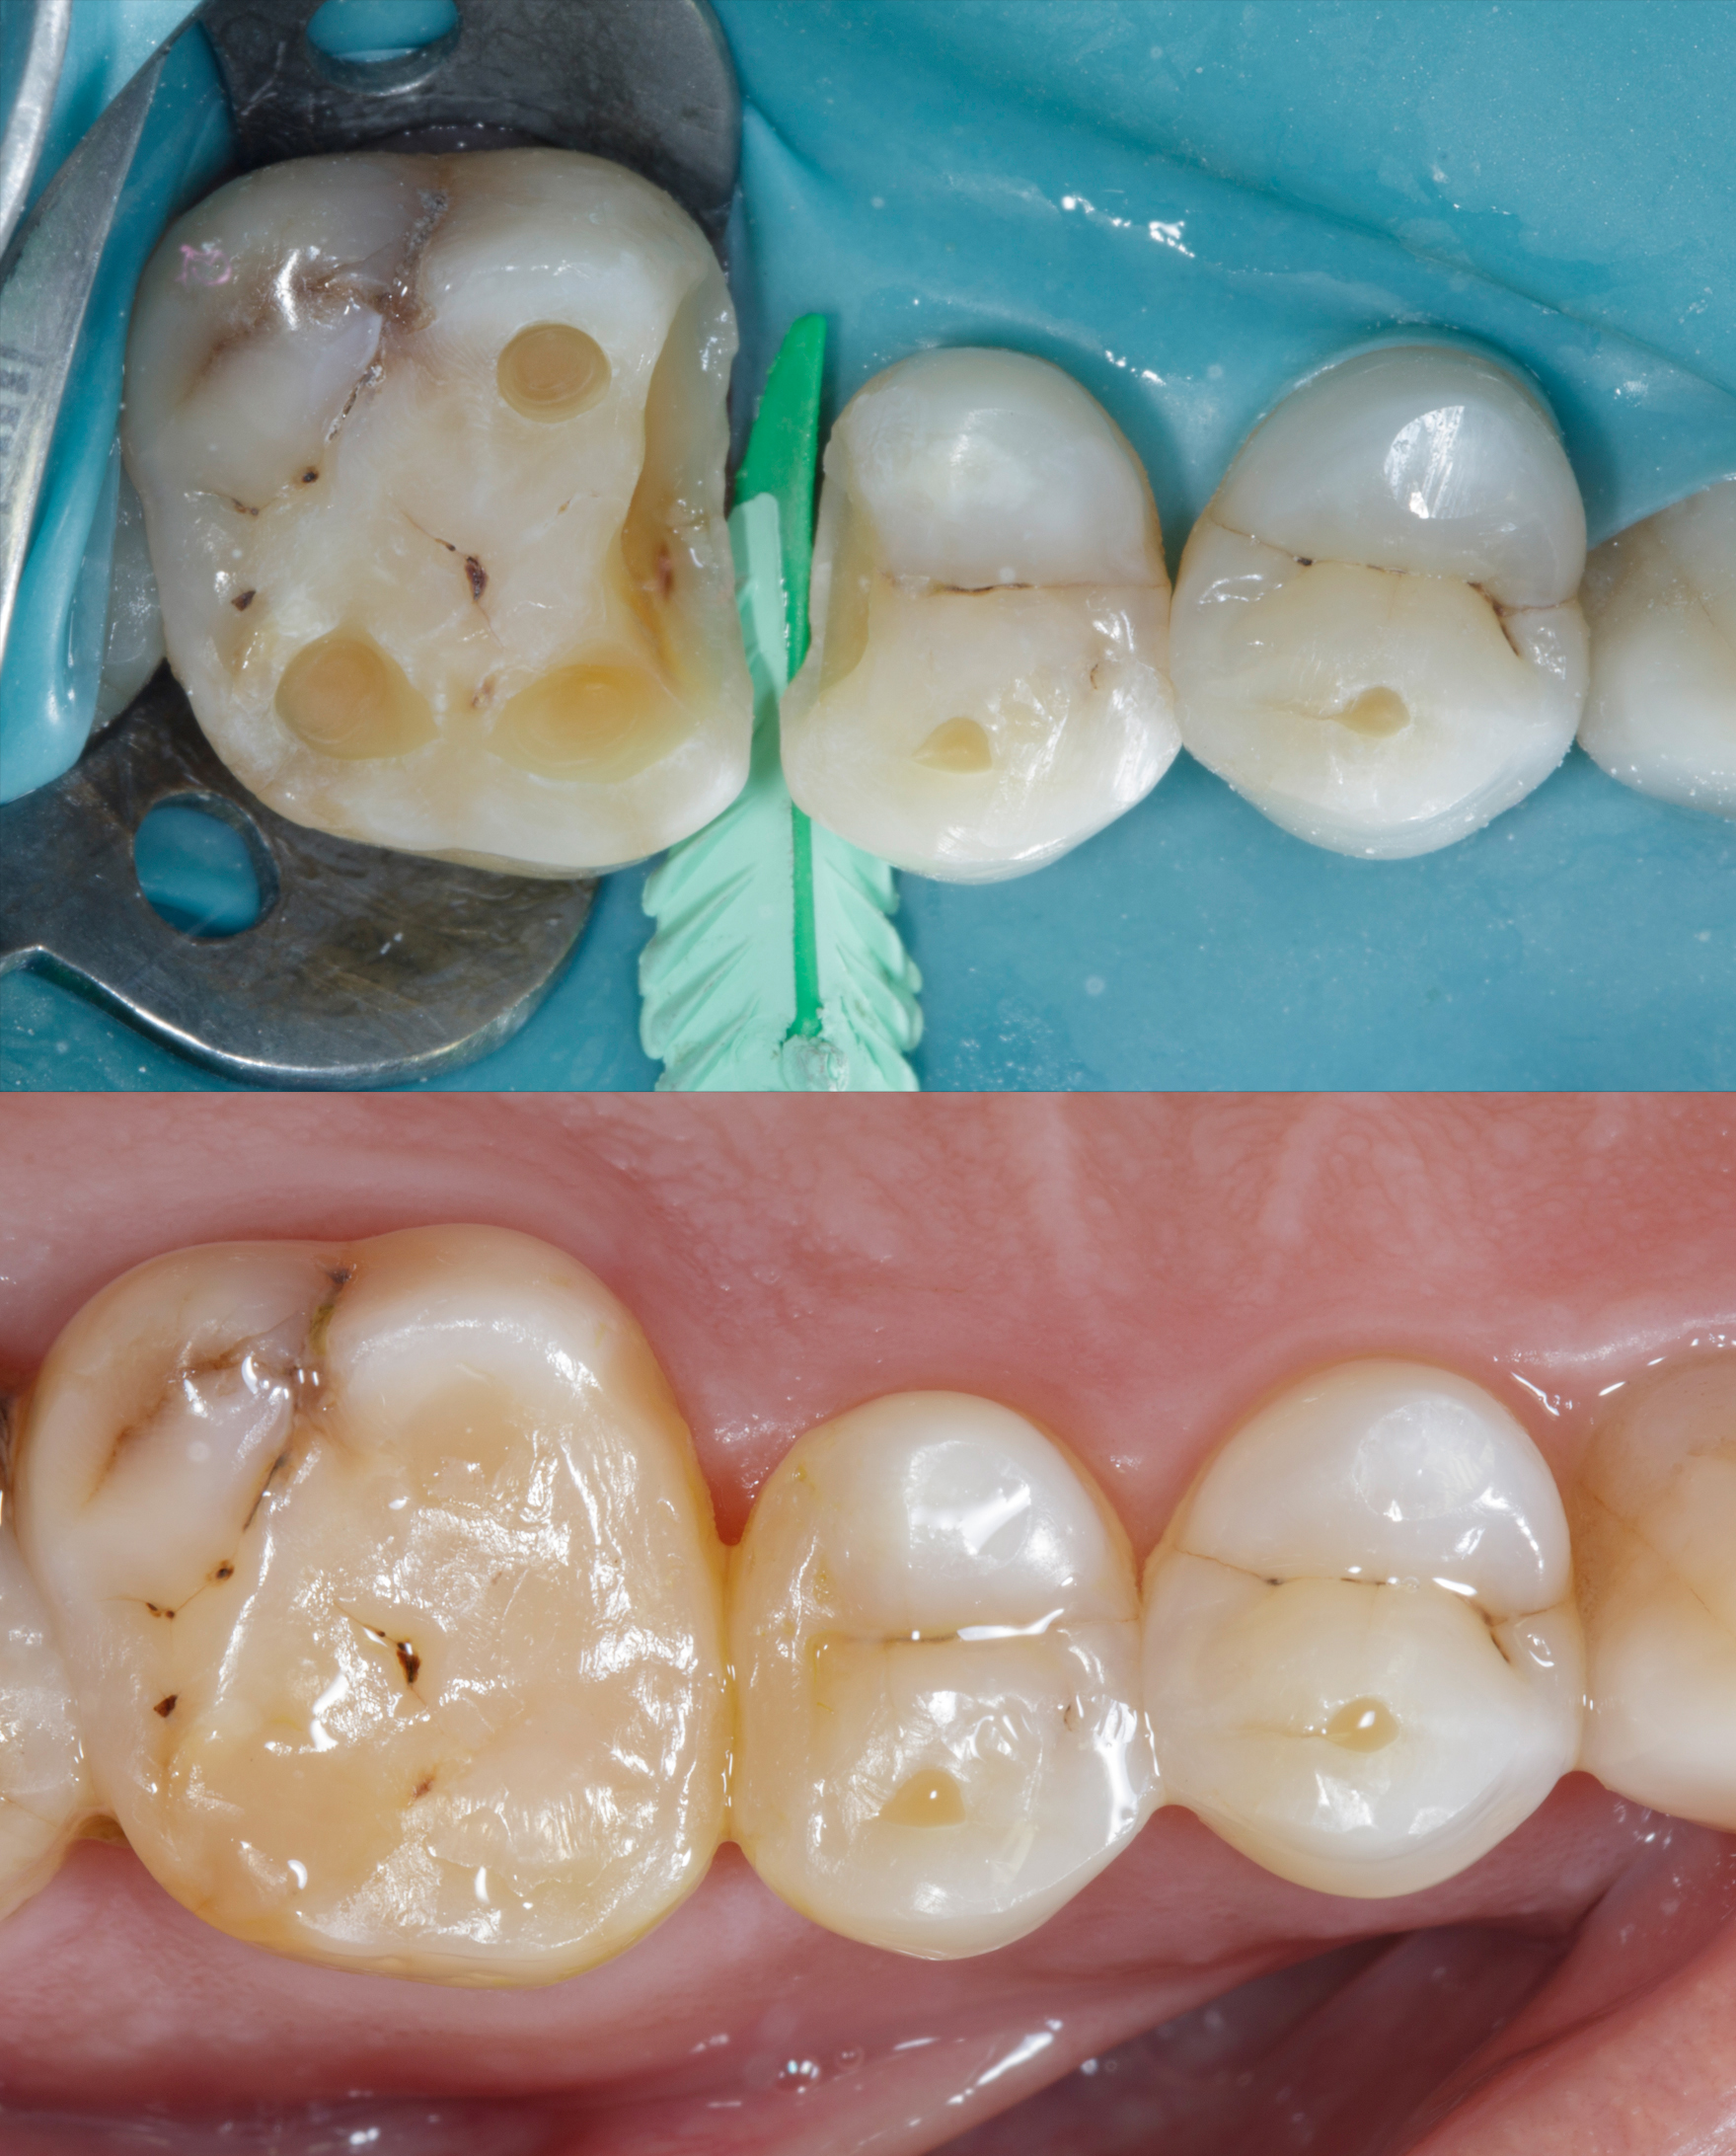
Clinical examination reveals composite restoration was done in between 1st molar and 2nd premolar. It looks like restoration just placed without any sectional matrix system joining both adjacent class 2 defect. The palatal view shows composite has placed directly on the gums which leading to gingival inflammation giving pain to the patient. Overall teeth shows signs of erosion with loss of good amount of enamel suggestive because of acid reflux.
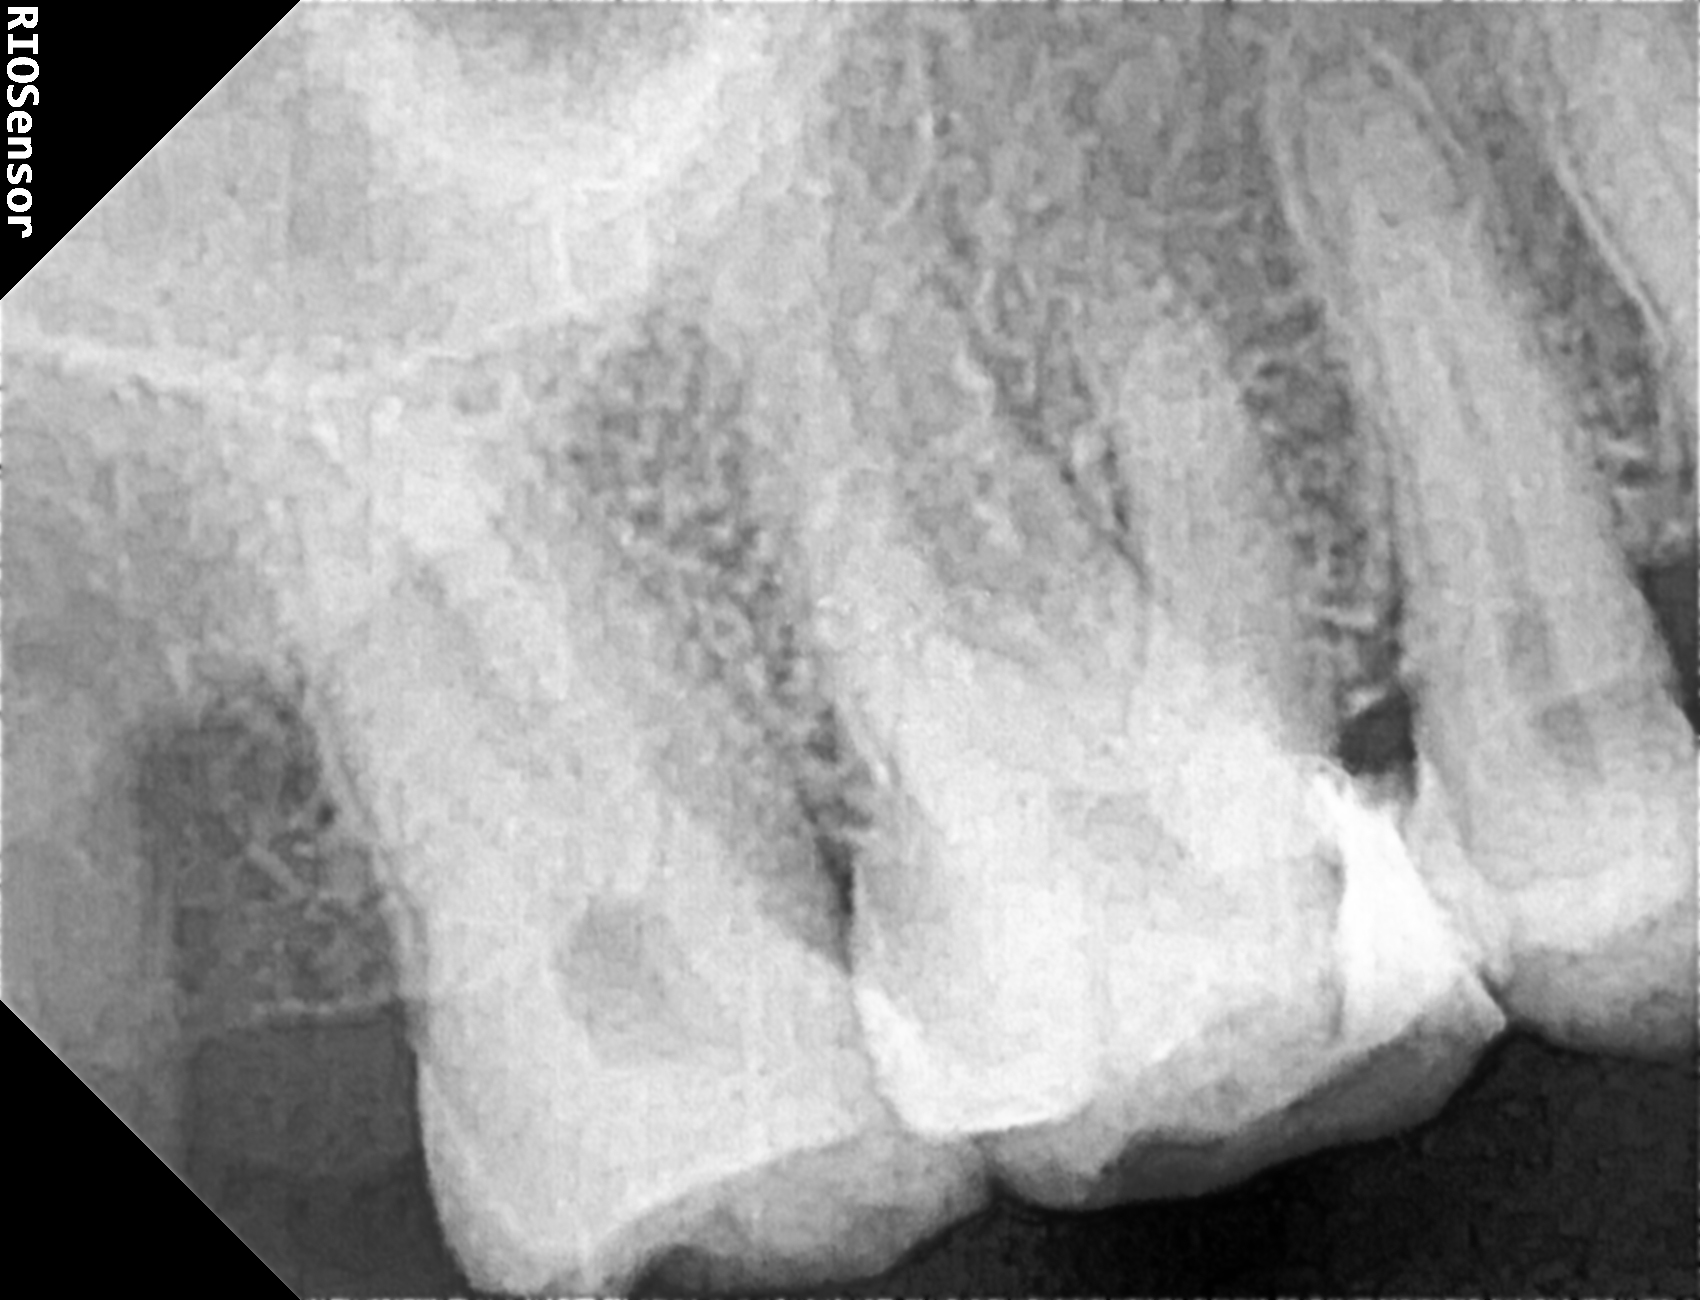
Iopa reveals adjacent class 2 defect on tooth #15 & #16 with no close proximity to the nerve. The single composite restoration has placed in between these 2 defects.
|
| Pic 01 – Composite restoration placed in adjacent defects without use of any sectional matrix system. Occlusal erosion facets seen due to acid reflux with flat anatomy of the teeth. |
|
| Pic 02 – Composite restoration impinging on gingival tissue, leading to pain for the patient. |
|
| Pic 03 - IOPA radiograph revealing a restoration with improper contouring and noticeable overhangs. |
Isolation & Preparation of New Cavity designs for better adhesive techniques
Rubber Dam Isolation: Use a wingless clamp with heavy rubber dam to achieve optimal bonding and increase the longevity of the restoration. Proper isolation is crucial for a successful adhesive process.
Caries Removal: Utilize caries dye for the thorough removal of carious tissue in teeth #15, #16, Old composite is removed and infected caries is removed using slow speed round carbide bur. It is essential to establish a peripheral seal zone free from infected and affected dentine to ensure the best bonding strength.
Enamel Preparation: Remove all unsupported enamel using a Super Fine Diamond Bur (yellow band). For new cavity designs, employ Cala Lilly burs, which are specifically engineered for adhesive composite restorations and designed to resist tooth fracturing.
New Cavity design Technique: Following Dr. Richard Simonson’s concept, aim to avoid connecting the occlusal to the interproximal areas during first-time interproximal caries restoration (see pic 03). Finish the proximal walls with Shofu Super-Snap disks: start with the violet disk, followed by green and pink disks. This approach ensures optimal bonding to the enamel and helps prevent potential microleakage. Due to acid erosion the dentine turns into sclerotic leading to very poor bonding strength so decided to do a proper Air particle abrasion iusing 25-micron aluminum oxide powder for more than 10 secs. This process cleans the cavity preparation and enhances bonding strength, particularly by increasing some microporosity in the sclerotic dentine.

|
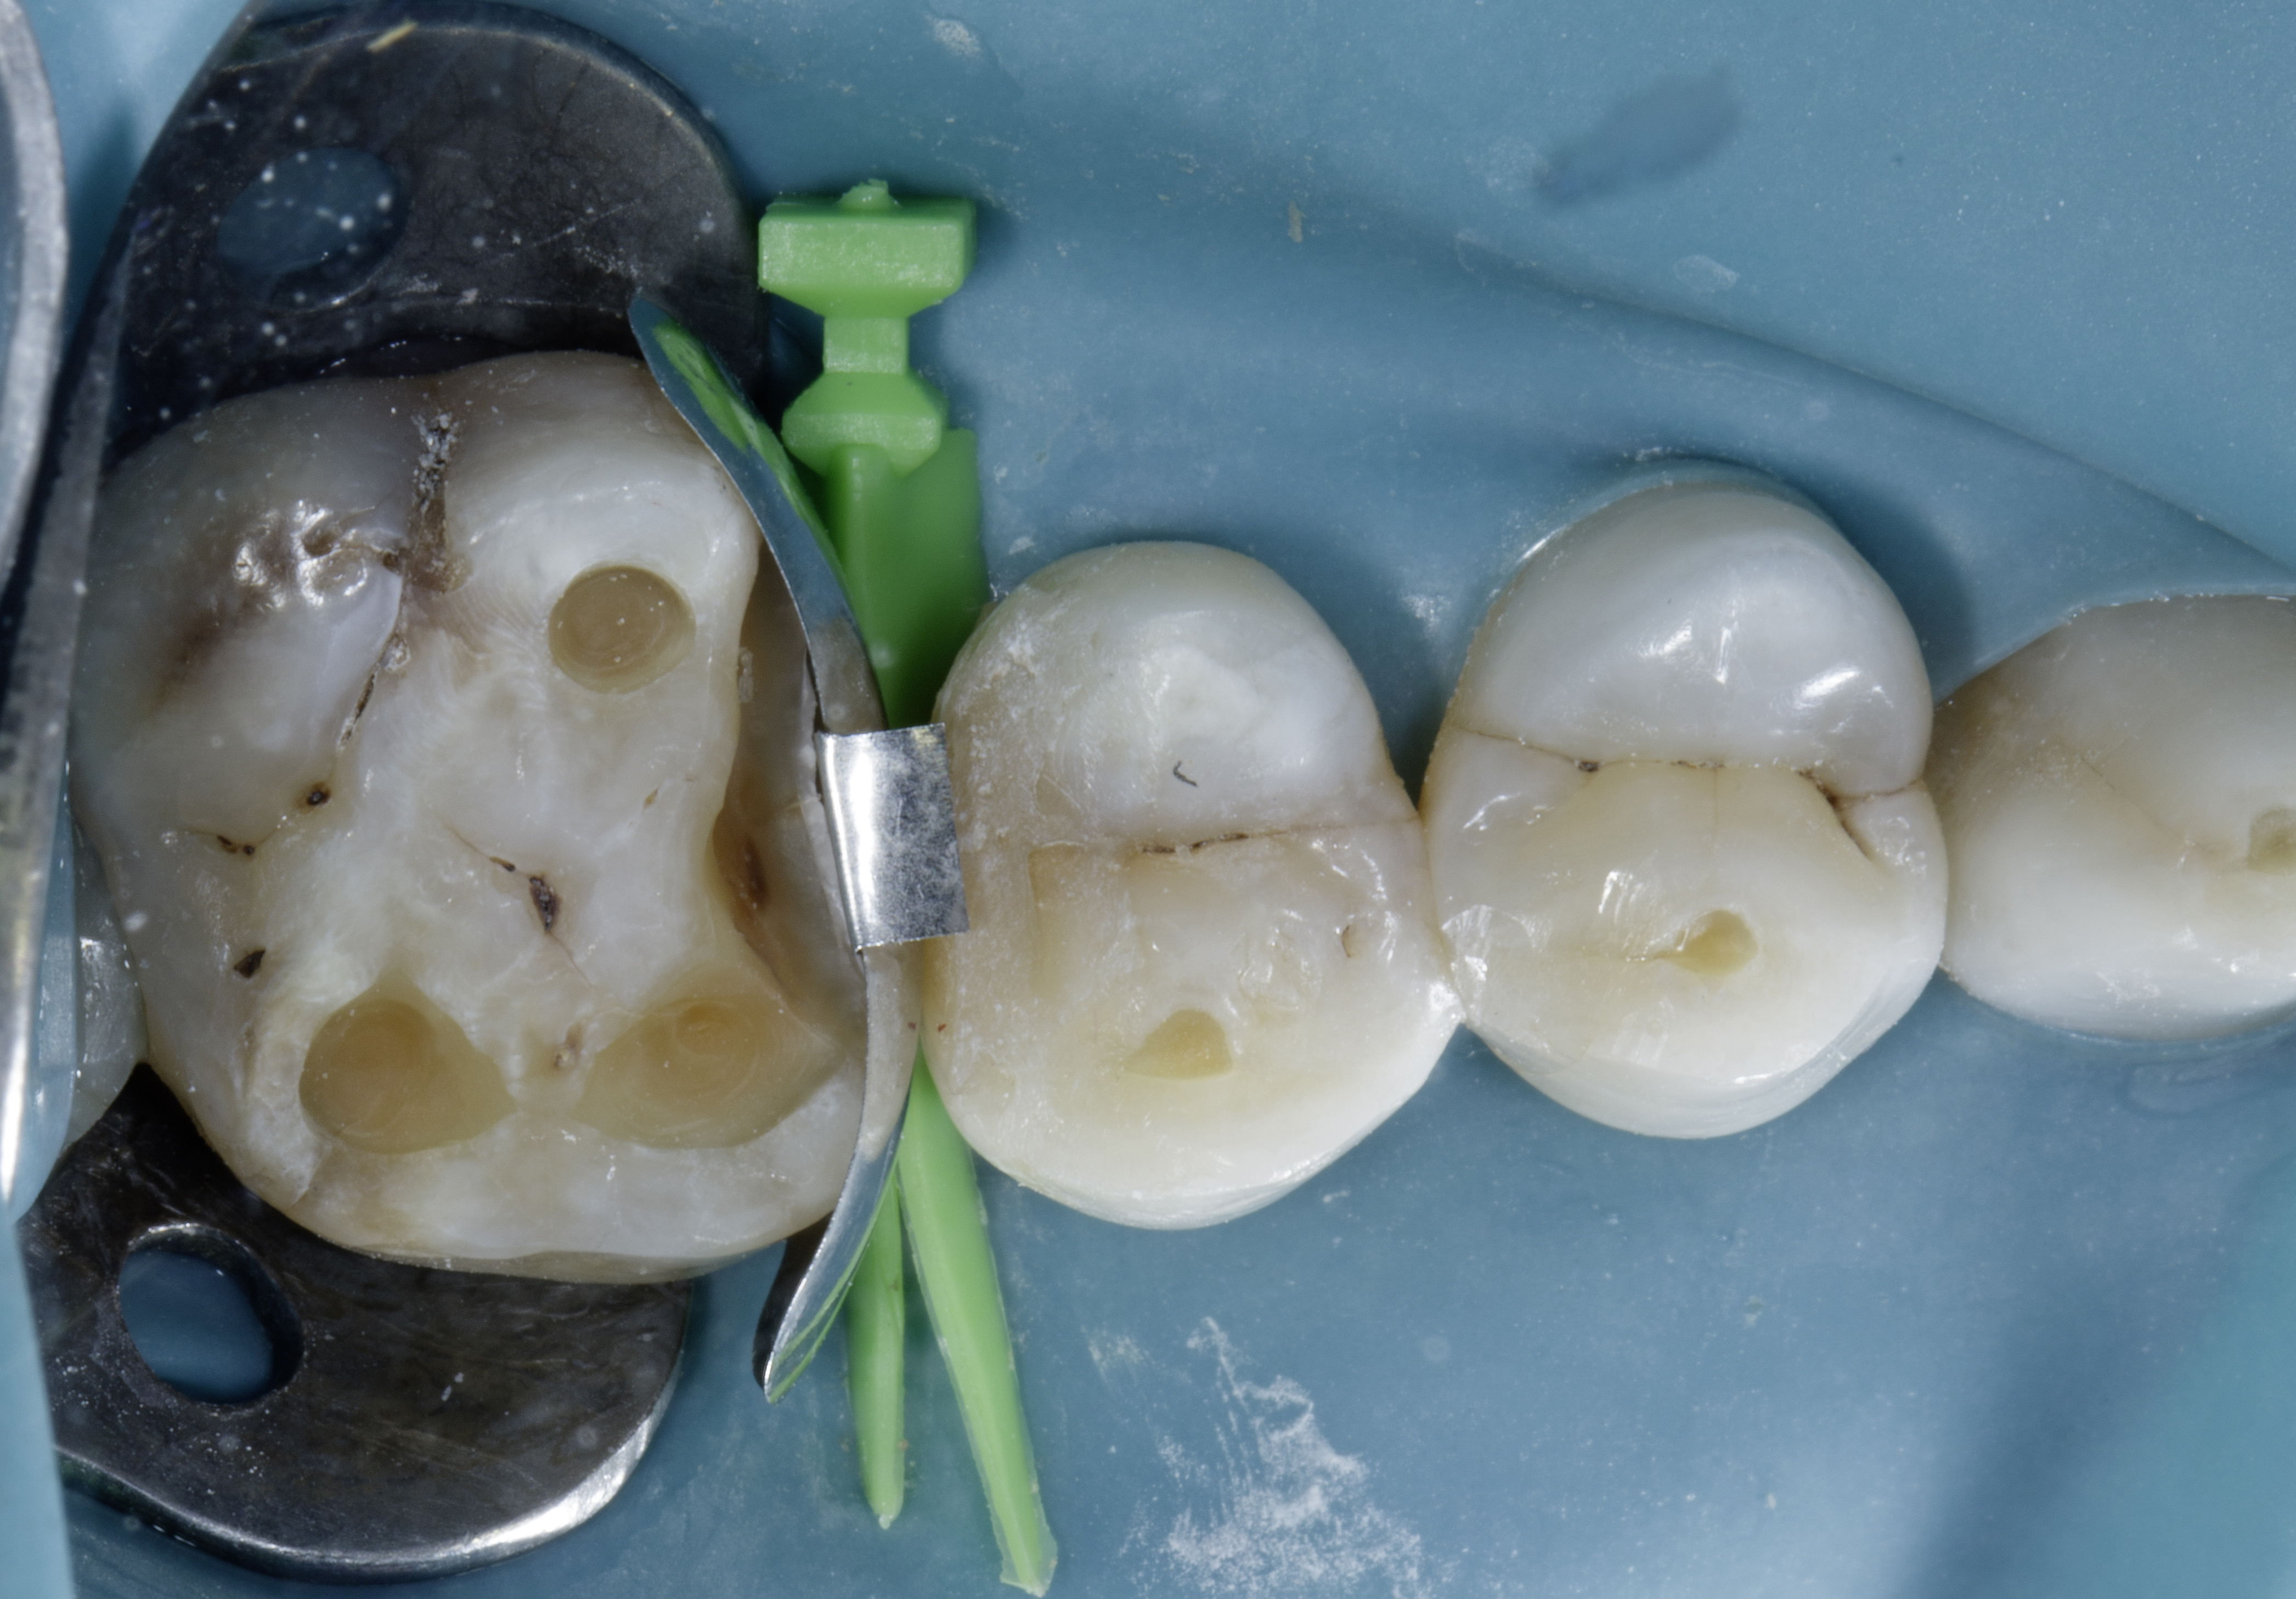
| Pic 04 – Caries end point removal, achieving peripheral seal zone, Removing unsupported enamel, . The picture was taken after air abrasion and selective etching was performed. Garrison Strata G Firm wedge placed as prewedging to protect rubber dam. |
Selecting the appropriate sectional matrix system is crucial in such adjacent large defect cases so we choose Garrison Quad system. It is essential to ensure that the marginal ridge is correctly dimensioned and aligns with the occlusal anatomy. This alignment is vital for creating well-defined adjacent triangular fossae and a properly shaped occlusal embrasure. Therefore, the height of the marginal ridge largely depends on the choice of band height. Here we choose Firm band FXH 200
The firmness of the band material facilitates easy placement and secure fitting, they bands maintain their shape and do not distort during the composite injection molding procedure, ensuring accurate and reliable restoration outcomes.
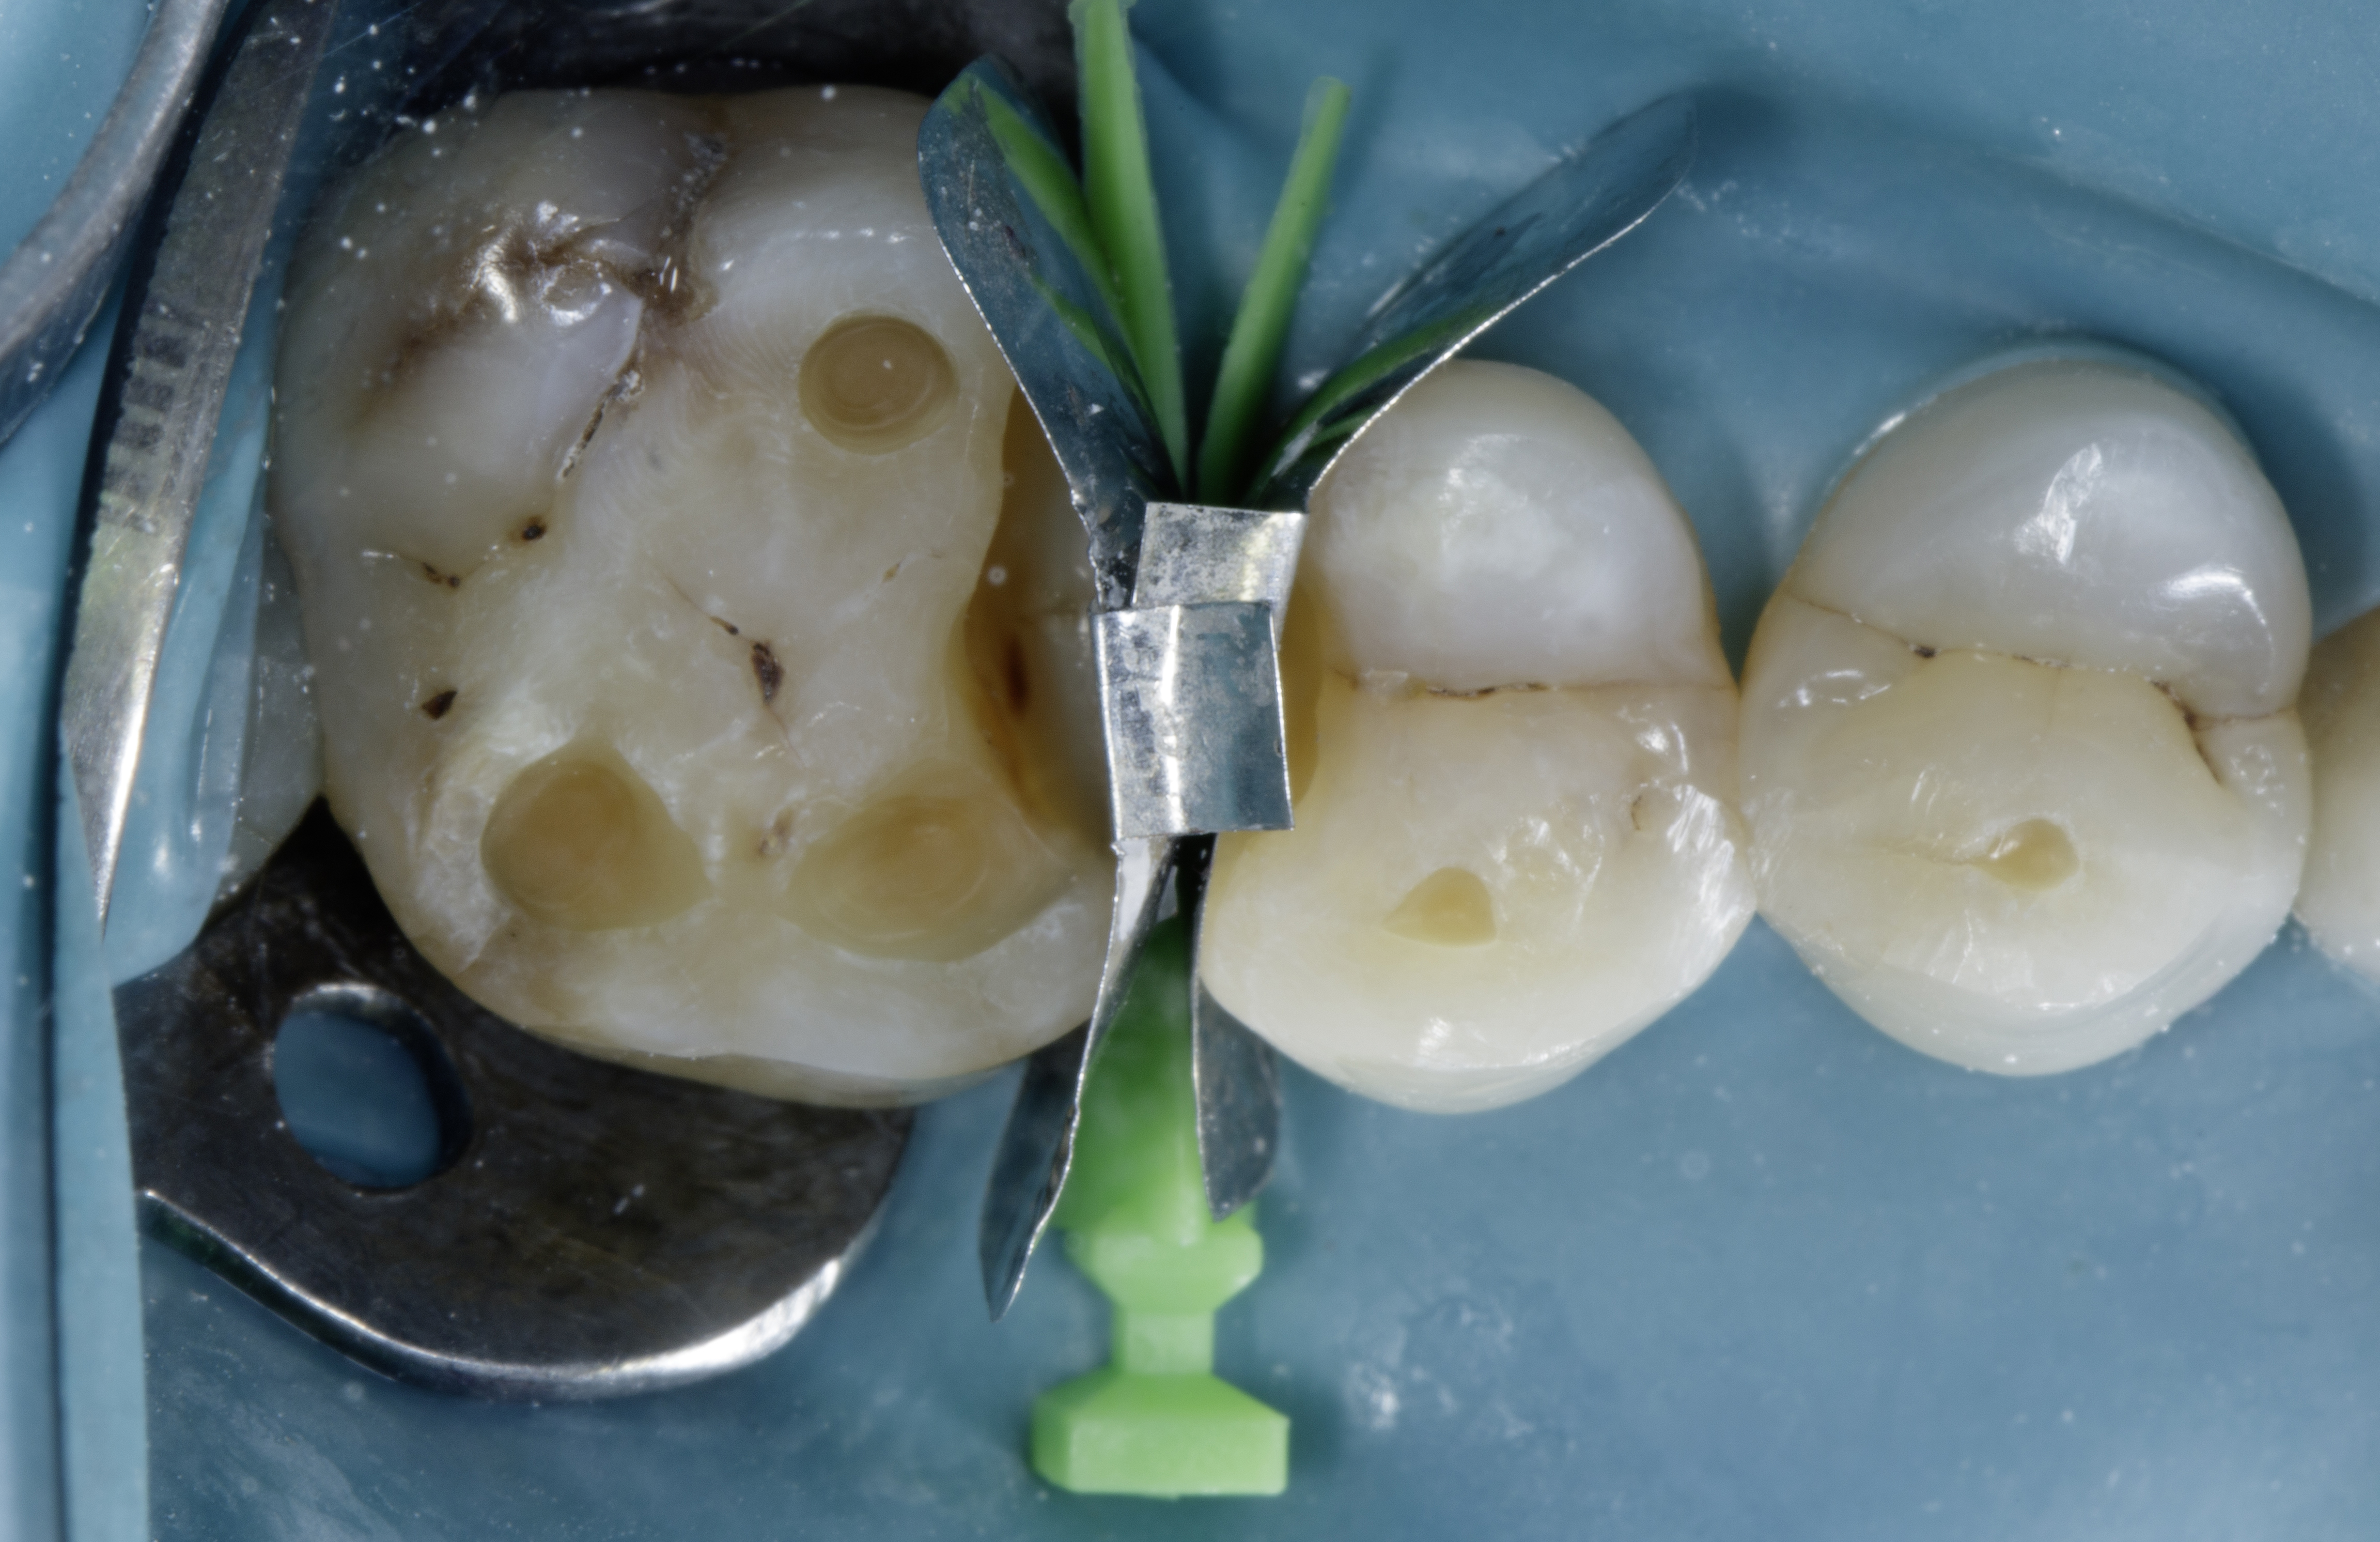
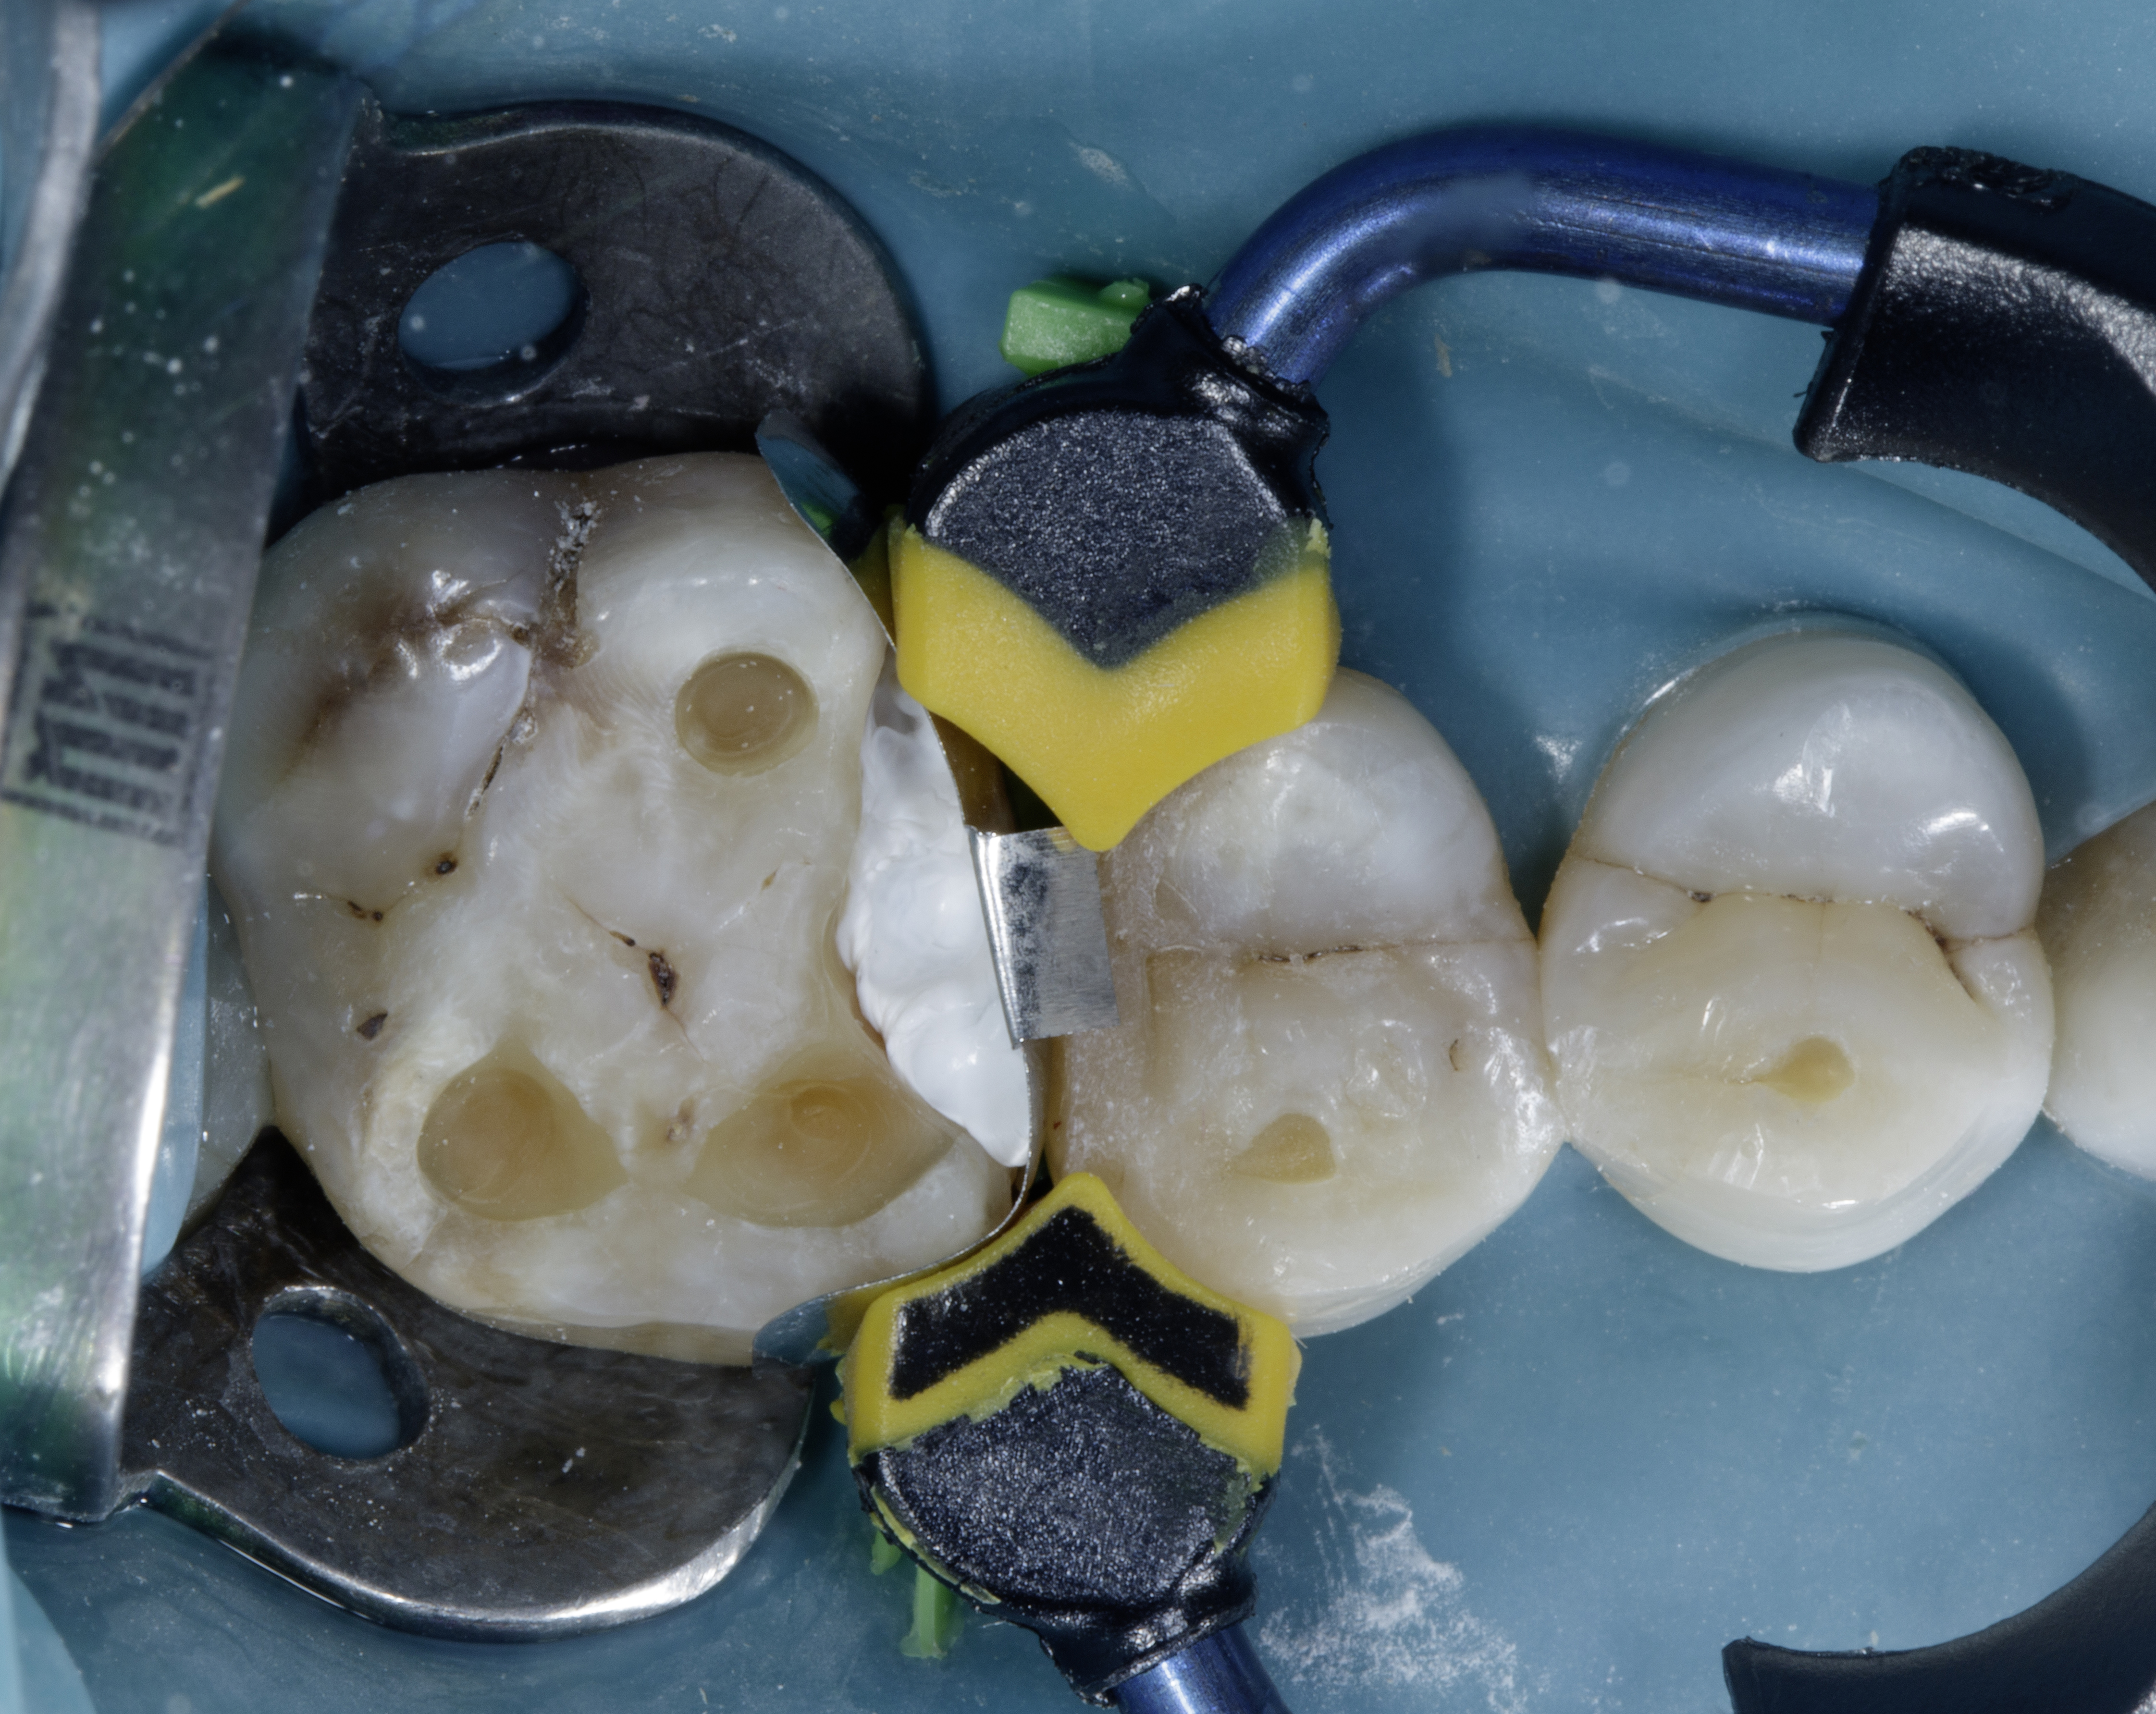
The first band (FXH 200) was placed in the distal defect of tooth #15 and secured using a Large Quad Wedge (Pic 05).
Next, an identical band was inserted into the mesial defect of tooth #16 by slightly repositioning the wedge, allowing the band to pass beneath it. The wedge was then reinserted to its full length, holding the bands in place with gentle finger pressure, ensuring both bands were securely positioned beneath the wedge. (Pic 05)
|
| Pic 05 - The FXH 200 band was securely positioned using a Large Quad Wedge placed from Buccal, ensuring a tight seal. |
Restoring #15
Since the adjacent defects are larger with larger interdental space, we decided to do the defect one by one. Due to small defect on tooth #15 compared to #16 we decided to do 1st #15 using injection molding technique without placing the matrix ring.
After applying the bonding agent, we used a thin layer of Shofu Injectable Xsl—a high-strength, self-levelling, 2nd generation injectable material—to seal the dentine. This initial layer, approximately 0.5 mm thick, is crucial for protecting the hybrid layer from shrinkage stress. The self-levelling properties of this material allow it to effectively adapt to uneven surfaces, ensuring a smooth application without air bubbles and minimizing post-operative sensitivity.
The 2nd increment we placed small quantity of Injectable Xsl A3O followed by packable composite Shofu Beautifil LS II A3.5 in injection molding technique manner. The excess composite is removed and marginal ridge is contoured properly.

|
| Pic 06 – Premolar is ready for the injection molding using Shofu Injectable Xsl A3O and Packable Shofu Beautifil LS II A3.5 |
After curing from all sides, the band and wedge are removed. Due to the rigidity of the band no excess flange and over contoured seen due to placing adjacent band. (pic 07)
|
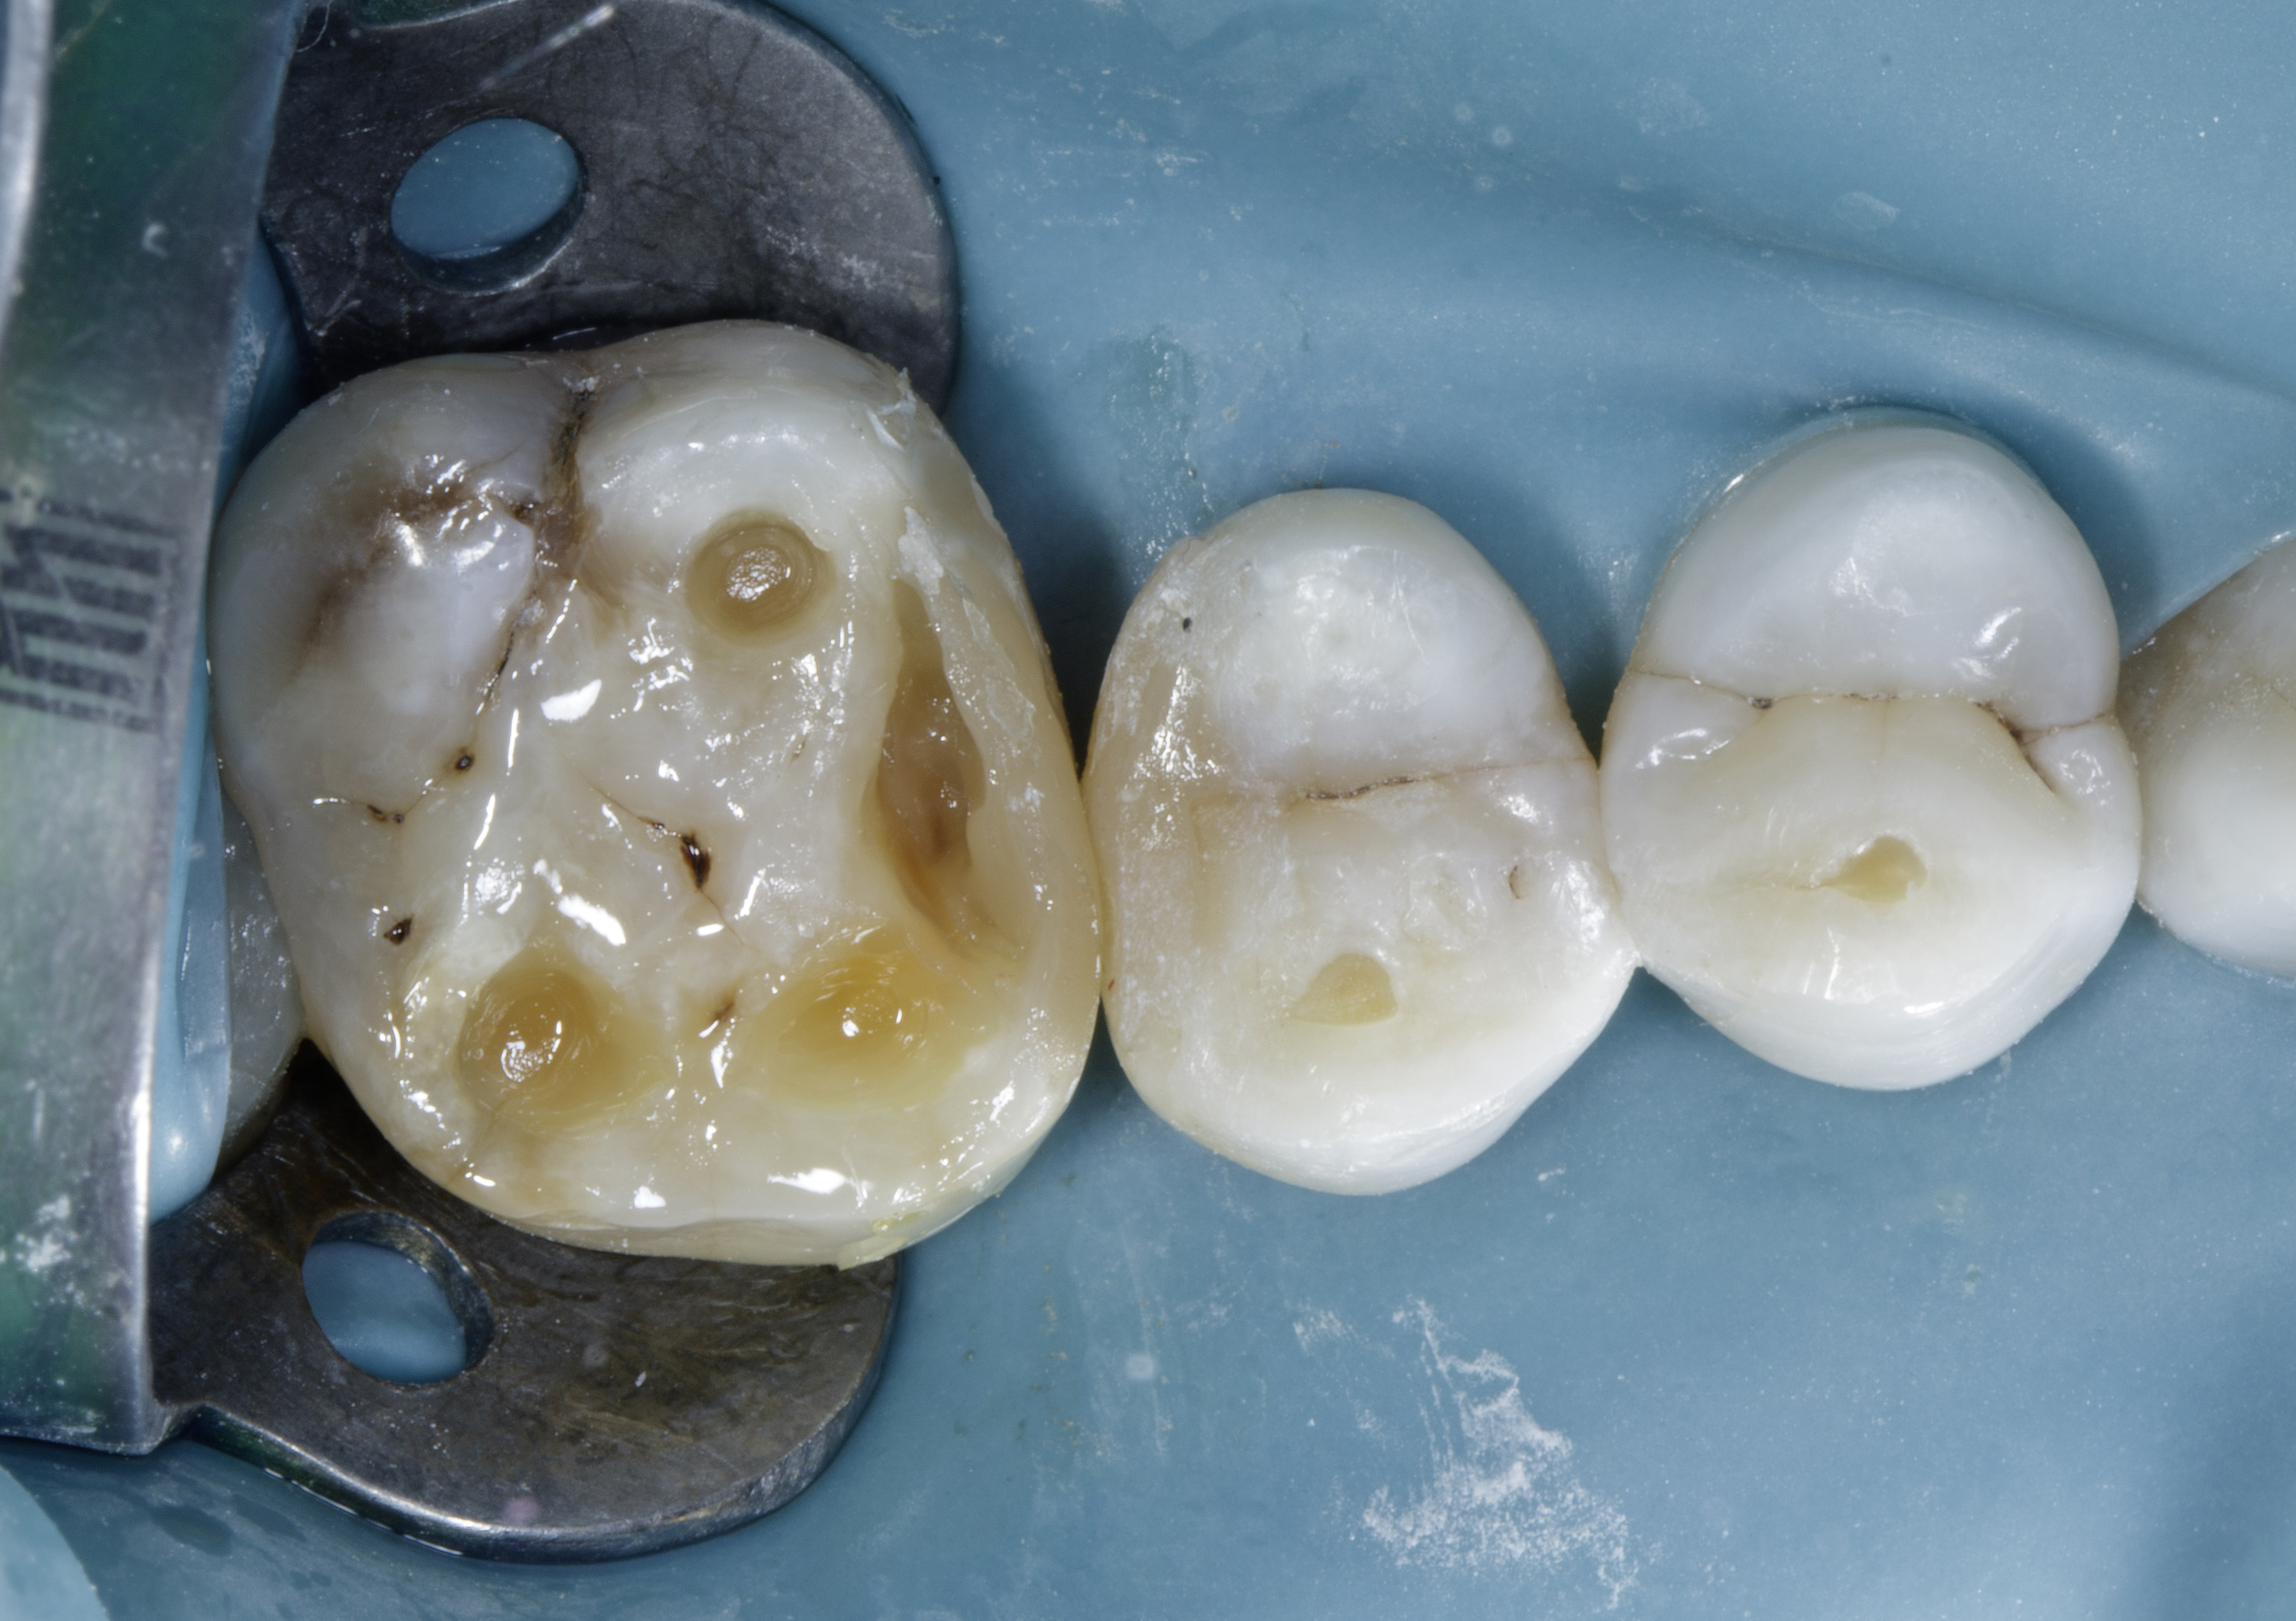
| Pic 07 – After removal of the bands, note the contour without any excess flange. |
Restoring #16
Due to the larger defect on the palatal side compared to the buccal, we inserted the Quad large wedge from the palatal. The unique design of the wedge, with its broader area, ensures that the band is securely positioned at the wider defect, eliminating any gaps at the gingival seat area.(Pic 08)
|
| Pic 08 – The Quad large wedge was placed and secured with the FXH 200 band from the palatal side, addressing the wider defect on that side and effectively eliminating any gaps at the gingival seat area. |
Once the band is securely in place, the Quad ring is selected and positioned with its driver tip on the buccal side, following the placement of the wedge from the palatal. Teflon tape is then placed inside the defect to shape the band to the adjacent tooth, ensuring ideal contour and contact. (Pic 09)
|
| Pic 09 – The Quad ring was placed with its driver tip from the buccal side, and Teflon tape was used to shape the band to match the contour of the adjacent tooth, ensuring an ideal contact and contour. |
The bonding process and a thin layer of Shofu Injectable Xsl were applied in the same manner as for tooth #15. Due to the larger defect, we decided to convert the Class 2 into a Class 1 by first creating the wall. To achieve this, we used the snow plow technique with a stress-reducing layering approach. This involved building the walls separately on the palatal and buccal sides using Shofu Injectable XSL A3O and Packable Shofu Beautifil LS II A3.5. (Pic 10)
|
| Pic 10 – Converting Class 2 to Class 1 |
The remaining defect is restored using the same snow plow technique. Additionally, the occlusal erosion facets are also restored.
The contours and embrasures were well established and finished using a Shofu Super Snap purple disk. The oxygen inhibition layer was removed using sodium bicarbonate powder with an air polisher unit.(Pic 11)

|
| Pic 11 - After restoring tooth #16, note the ideal contacts and contours, with no excess flange present. |
A rubber dam was removed, and high points were checked using 40-micron paper, followed by 8-micron foil in static occlusion. For dynamic occlusion, 200-micron paper was used, and adjustments were made to the cuspal slopes and non-functional cusps.
An IOPA was taken to ensure there are no overhangs (Pic 12)

|
| Pic 12 - IOPA radiograph demonstrating well-established natural contacts and contours, free from overhangs. Note the properly formed occlusal embrasures.. |
A large soft tissue defect is visible due to the faulty restoration. With the newly restored teeth, this will support healing and promote soft tissue growth.(pic 13)
|
| Pic 13 – Note the soft tissue defect produced by previously faulty restoration. The finished restoration shows no overhangs which allows tissue healing in a natural manner. |
The patient was recalled after two weeks for a soft tissue assessment, where it was noted that the interdental papilla had grown back naturally. Pic 12
This wasn’t a miracle, but rather the result of using the proper technique with the Quad matrix. The patient was advised to use a water flosser to maintain regular oral hygiene and was also encouraged to consult a physician about his gastric reflux to prevent further enamel damage.
|
| Pic 14 – Papilla growth post 15 days. |
|
| Pic 15 – A photo collage illustrating the progression from the initial damage to the restoration, followed by the formation of the interdental papilla. |
|
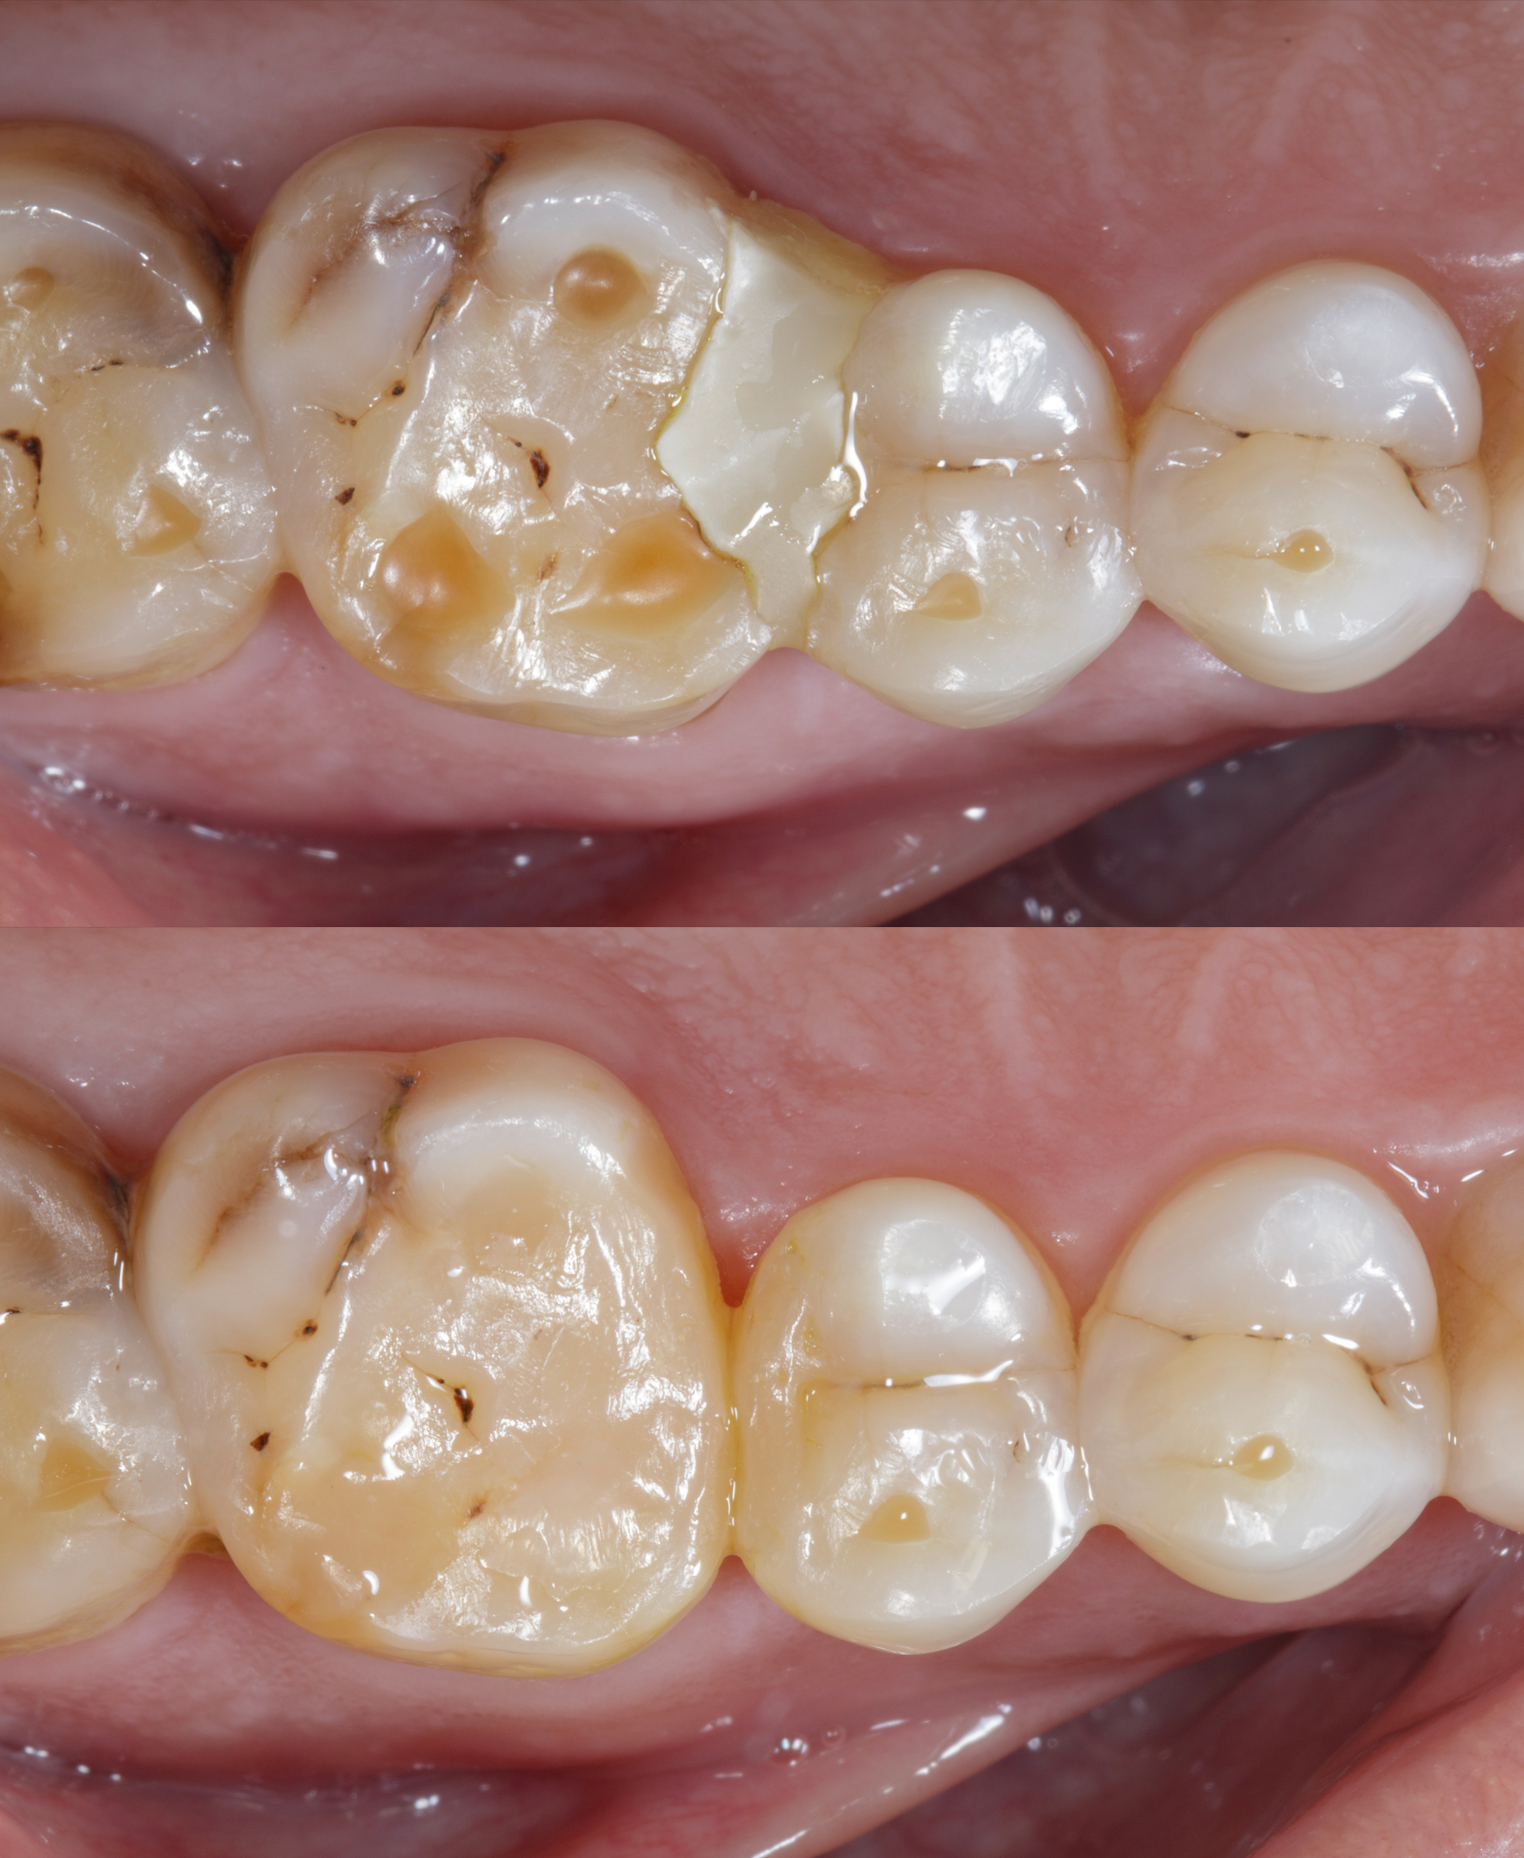
| Pic 16 - Before and After Collage: The images illustrate the natural contacts, contours, and morphology of the new restoration. |
|
| Pic 17 - Before and After Collage: The images illustrate the natural contacts, contours, and morphology of the restoration. |