Case Details
Clinical History:
A 40-year-old woman visited our office with sensitivity to cold and food getting stuck in her lower right quadrant. Unfortunately, her fear of dentistry had caused her to delay seeking treatment for months.
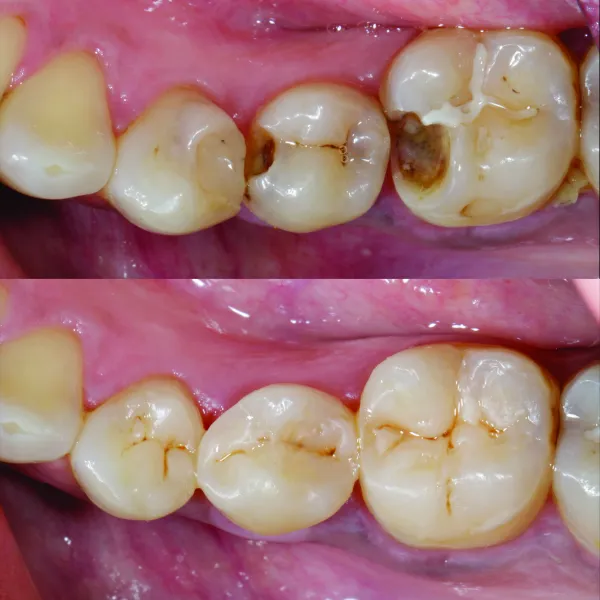
Clinical examination revealed extensive Class II defects on teeth #45 and #46, characterized by the loss of mesial marginal ridges on both teeth, as well as a portion of the mesiobuccal cusp on tooth #46. Tooth # 45 shows discoloration on distal aspect suggesting another Class II defect. Additionally, tooth #44 exhibited discoloration beneath the existing Class II composite restoration. The remaining walls were found to be weak, measuring less than 2mm, and appeared to be unsupported by dentin.
An IOPA (Intraoral Periapical Radiograph) revealed multiple Class II defects on mesial/distal of #45, mesial of #46. Tooth #44 shows clear signs of decay underneath by its radiolucency. All the defects not showing close proximity to the pulp. There was no pain upon percussion, and no signs of periapical infection were observed.
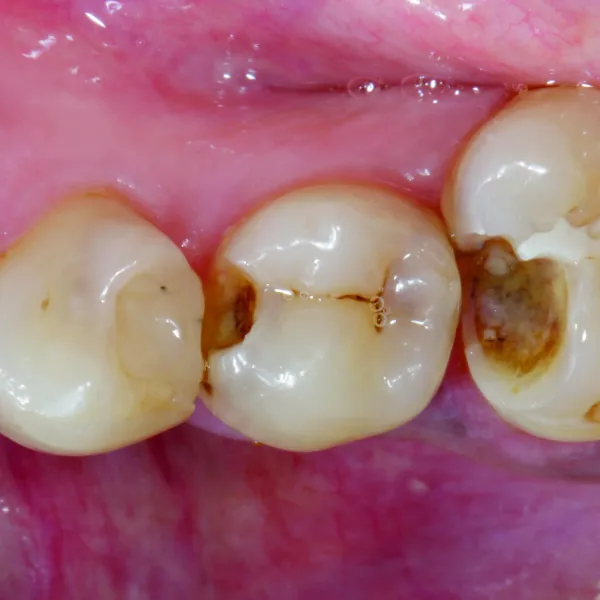
Class II defect (mesial) tooth #45 and #46 with suspected distal Class II defect on tooth #45. Tooth #44 shows discoloration beneath the existing Class II composite restoration, with weak and unsupported walls. |
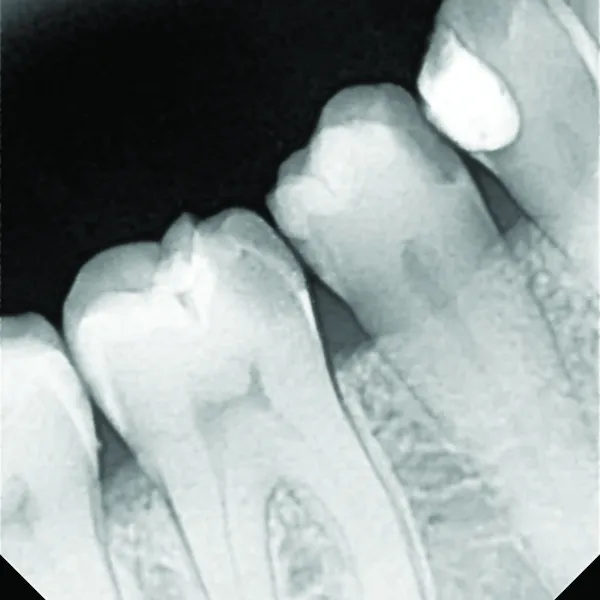
Multiple Class II defects. #44 shows underline decay; #45 mesial/distal Class II defect, and #46 mesial defect. |
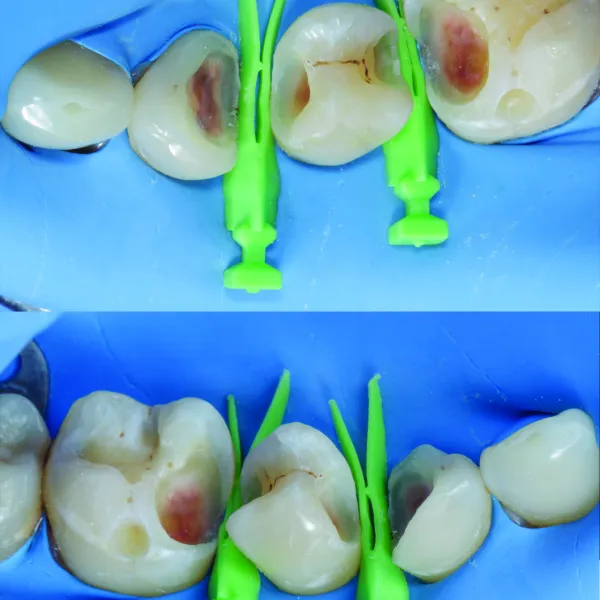
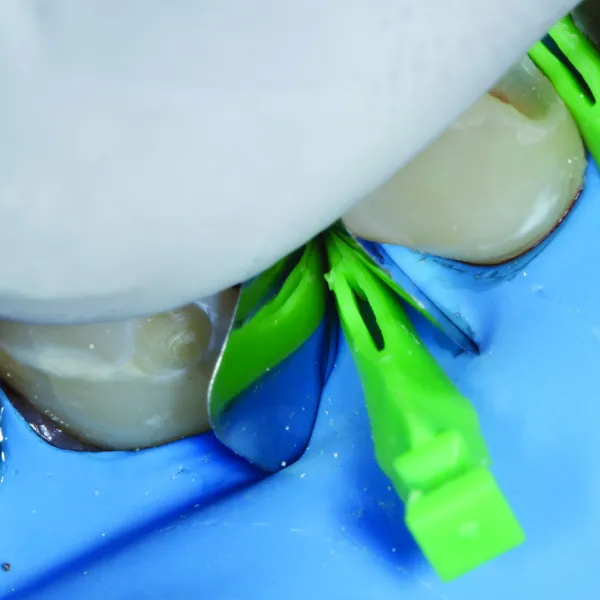
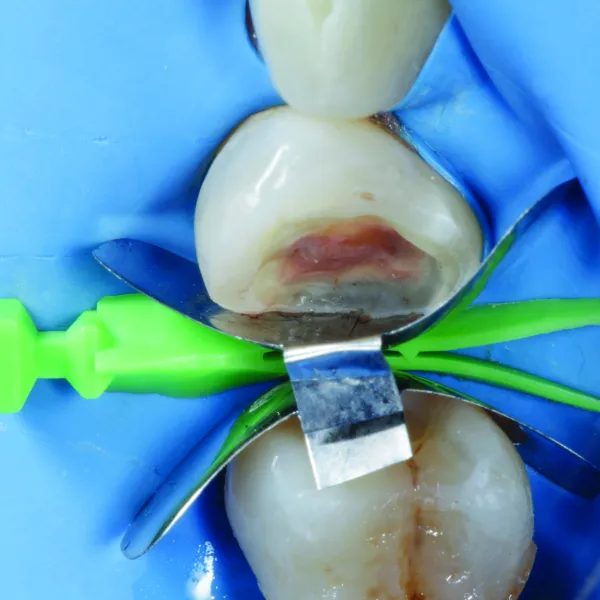
Caries end point removal, achieving peripheral seal zone and removing unsupported enamel. The picture was taken after air abrasion and selective etching was performed. Garrison® Quad Matrix System™ large wedge was placed as prewedging to protect rubber dam. |
Isolation and preparation of new cavity designs for better adhesive techniques
Rubber Dam Isolation: Use a wingless clamp with heavy rubber dam to achieve optimal bonding and increase the longevity of the restoration. Proper isolation is crucial for a successful adhesive process.
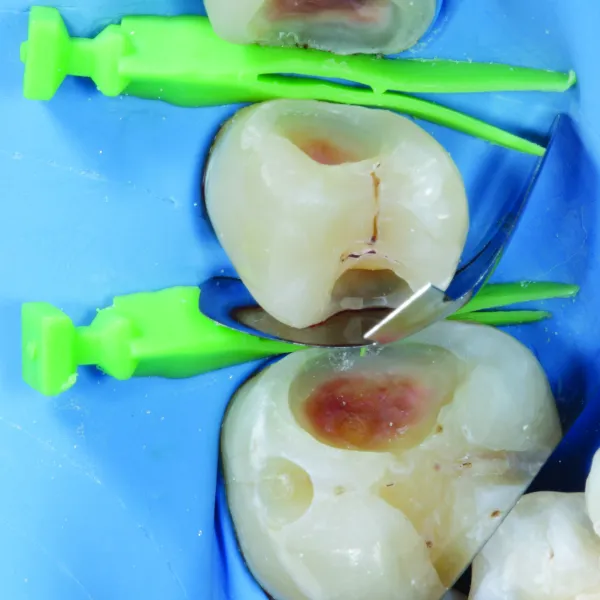
Caries Removal: Utilize caries dye for the thorough removal of carious tissue in teeth #45 and #46. Old composite is removed from tooth #44 and infected caries is removed using slow speed round carbide bur. It is essential to establish a peripheral seal zone free from infected and affected dentine to ensure the best bonding strength.
Enamel Preparation: Remove all unsupported enamel using a Super Fine Diamond Bur (yellow band). For new cavity designs, employ Cala Lilly burs, which are specifically engineered for adhesive composite restorations and designed to resist tooth fracturing.
New Cavity Design Technique: Following Dr. Richard Simonson’s concept, aim to avoid connecting the occlusal to the interproximal areas during first-time interproximal caries restoration (see Figure 3). Finish the proximal walls with Shofu Super-Snap disks: start with the violet disk, followed by green and pink disks. This approach ensures optimal bonding to the enamel and helps prevent potential microleakage. Air particle abrasion is performed using 25-micron aluminum oxide powder. This process cleans the cavity preparation and enhances bonding strength, particularly by increasing microporosity in the root dentin.
Given the extensive defects, particularly in tooth #44, indirect restoration initially seemed the most suitable option. However, after discussing treatment options with the patient, we decided to first proceed with a fiber-reinforced composite restoration using Ribbond fibers.
Selecting the appropriate sectional matrix system is crucial in such adjacent large defect cases, so we choose the Garrison® Quad Sectional Matrix™ system. It is essential to ensure that the marginal ridge is correctly dimensioned and aligns with the occlusal anatomy. This alignment is vital for creating well-defined adjacent triangular fossae and a properly shaped occlusal embrasure. Therefore, the height of the marginal ridge largely depends on the choice of band height. Here we choose Firm Band FXH175. The firmness of the band material facilitates easy placement and secure fitting, the bands maintain their shape and do not distort during the composite injection molding procedure, ensuring accurate and reliable restoration outcomes.
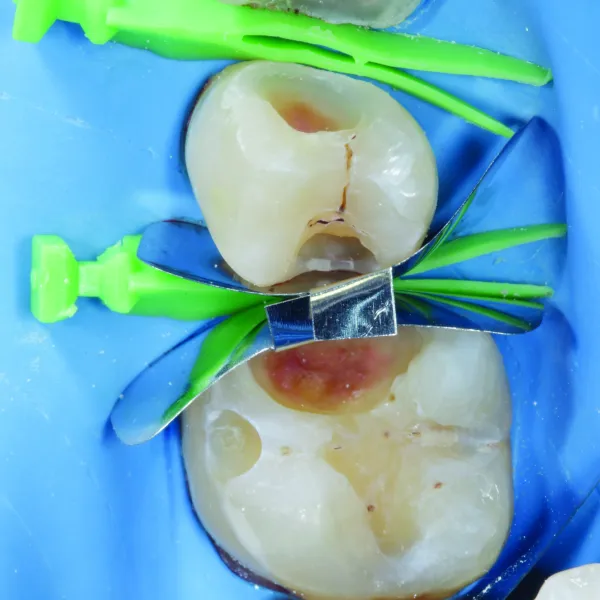
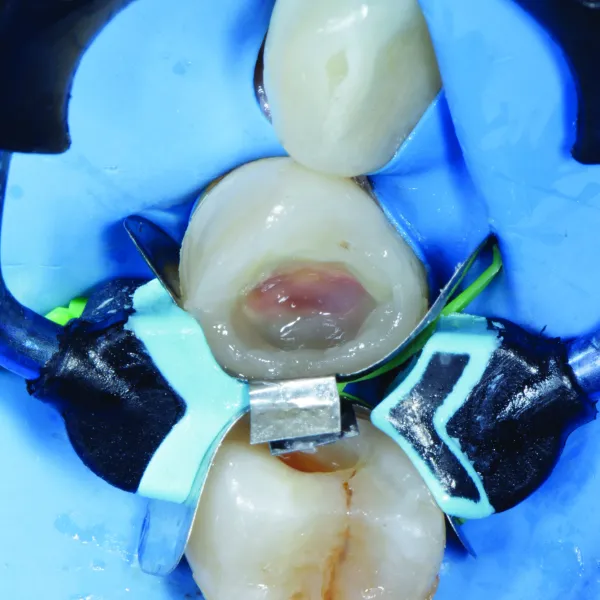
The first band (FXH175) was placed in the distal defect of tooth #45 and secured using a Large Quad Wedge. |
Next, an identical band was inserted into the mesial defect of tooth #46 by slightly repositioning the wedge, allowing the band to pass beneath it. The wedge was then reinserted to its full length, holding the bands in place with gentle finger pressure, ensuring both bands were securely positioned beneath the wedge. The wedge was partially removed, allowing for the molar band to be inserted more deeply using finger pressure. |
Both bands are secured with Quad large wedge ensuring tight seal. |
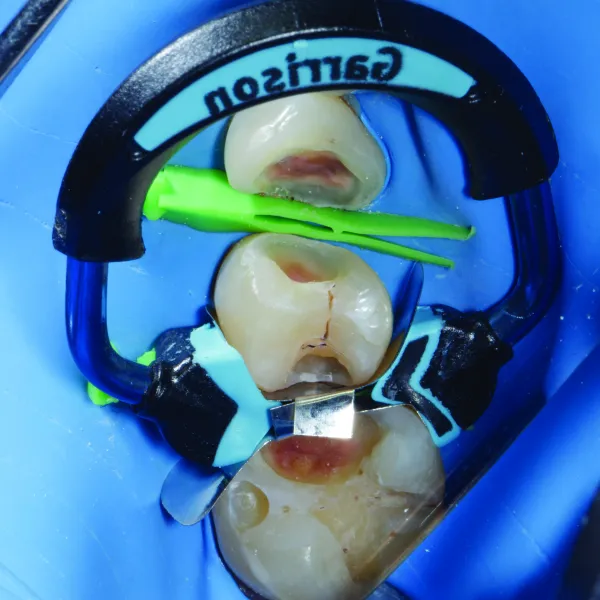
Next, a Quad Universal Ring (blue) was placed between teeth #45 and #46. The ring’s unique design works with the Quad wedge to create a tight seal, control excess material, and form a natural contact between the teeth. This combination also allows for efficient restoration of adjacent teeth. |
For both defects, after applying the bonding agent, we used a thin layer of Shofu Injectable Xsl—a high-strength, self-leveling, second generation injectable material—to seal the dentin. This initial layer, approximately 0.5 mm thick, is crucial for protecting the hybrid layer from shrinkage stress. The self-leveling properties of this material allow it to effectively adapt to uneven surfaces, ensuring a smooth application without air bubbles and minimizing post-operative sensitivity.
We made both walls using Shofu Beautifil LS II, a low-shrinkage composite with a shrinkage rate of 0.85% (shade A3). This is applied in two increments using the snow plow technique, complemented by a small quantity of Shofu Injectable Xsl (shade A3O). The marginal ridge is then refined in a second increment with a fine instrument to achieve the correct contour and an even occlusal embrasure. The firmness of the band facilitates accurate replication of the marginal ridge. This method effectively creates both the contact and the marginal ridge, converting the Class II to Class I. Later, the ring and bands are removed.

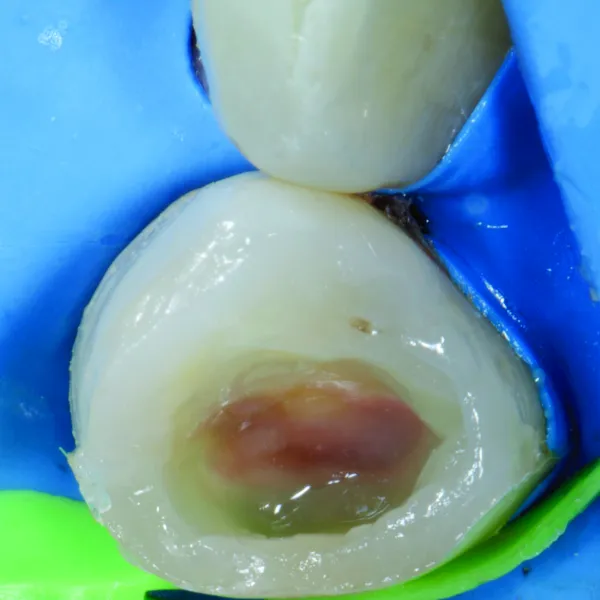
After removal of the ring and band (conversion of the Class II to Class I. |
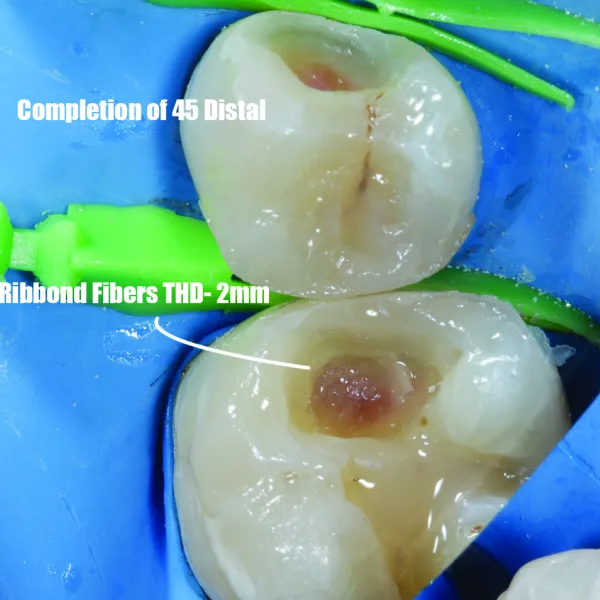
After converting the Class II to Class I, we completed final morphological incremental layering on tooth #45. Since the defect is large on tooth #46, we chose Ribbond fibers (2mm THD) to place inside the proximal box to increase fracture resistance. |

Later we completed cusp by cusp morphological layering for the tooth #46. |
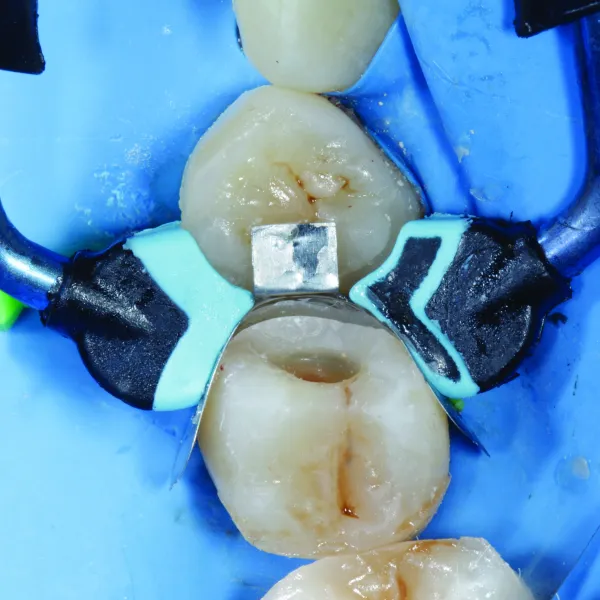
Both bands, FXH175, are secured with Quad large wedge ensuring tight seal. |
The procedure for placing the ring and following the layering protocol is repeated as described earlier Quad ring is placed and creating the wall of tooth #44 is completed. The ring is removed along with the band and morphological layering is completed on tooth #44. The ring is again placed and burnished little on adjacent tooth to ensure tight contact post removal of the band. The procedure of making the wall is performed as described earlier. |
Ribbond placement. |
Band is removed from tooth #44 and the wall of tooth #45 is built up. |
After completion of morphological layering on tooth #45, air abrasion with sodium bicarbonate was used to remove the smear layer. |
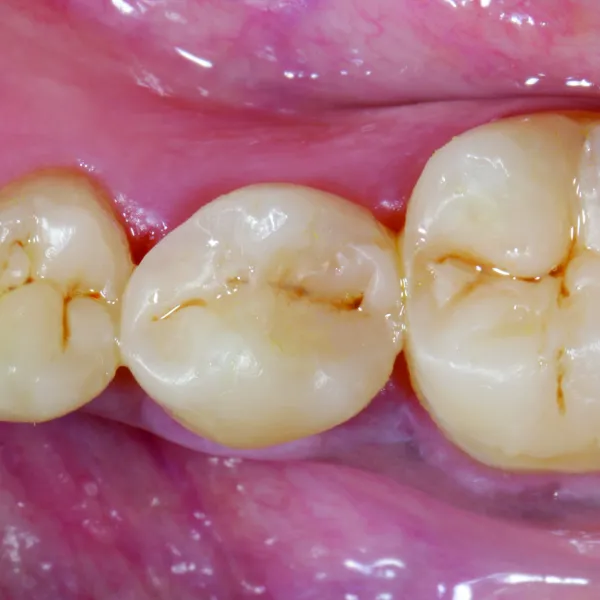
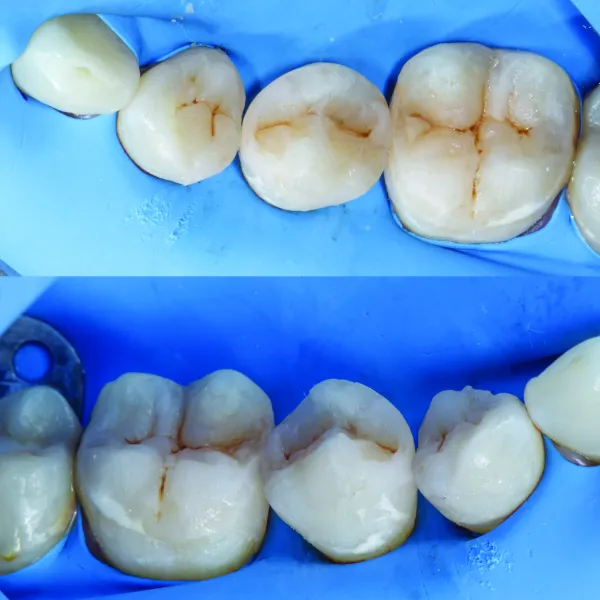
Post op 5 days shows close to natural morphology, contours and contacts. |
Before and after the treatment. |
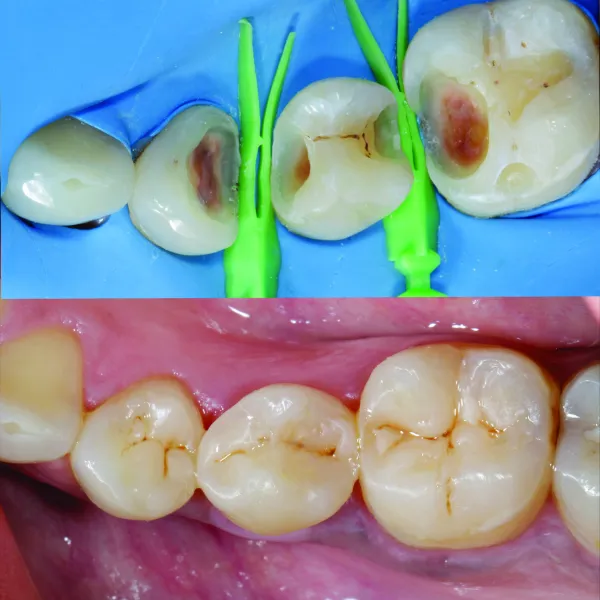
Showing how large defects were built in natural form and function. |
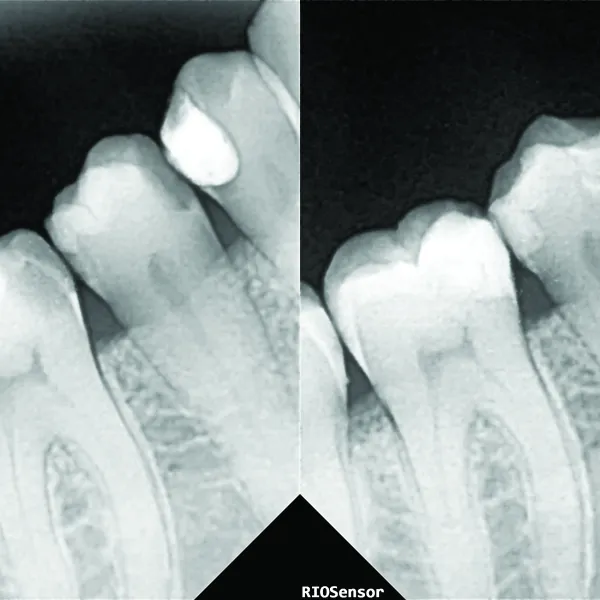
Pre- and post-op IOPA showing contacts and contours. The radiolucency you see in the restorations (teeth #44 distal, #45 mesial, and #46 mesial) is because I used RIbbond. |